
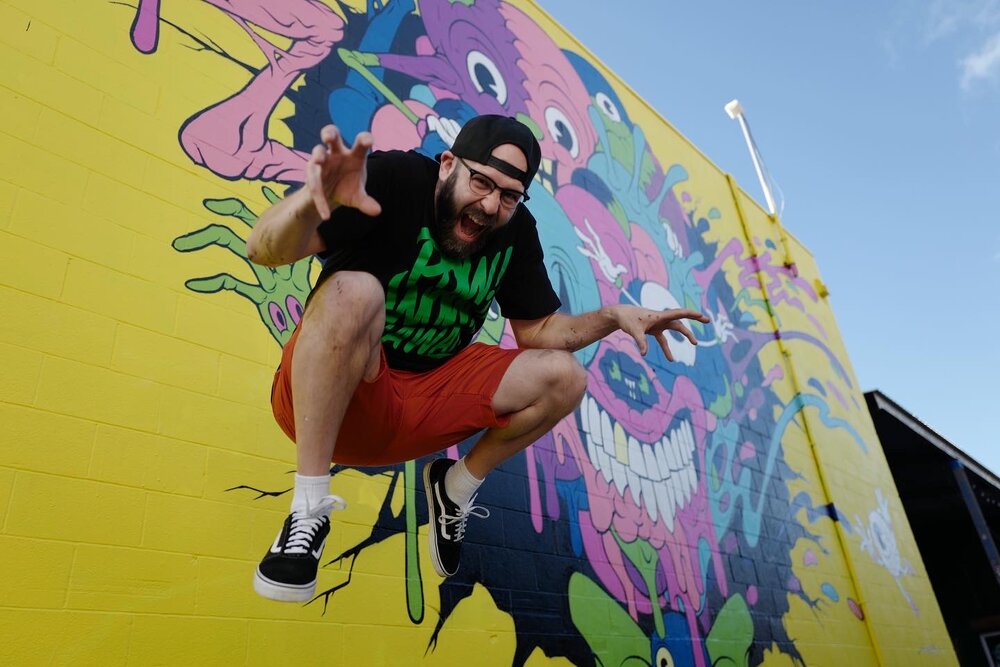
Creative Process is a series where artists offer a little behind the scenes peek into their art-making. Artist Alex Pardee recently wrote about his experience painting a mural at this year’s POW! WOW! arts festival in Hawaii and we’re excited to republish it here. Enjoy!
As a disclaimer, I don’t know if this is exactly how YOU should paint a mural, but this is how I PAINTED a mural, so welcome to my rollercoaster ride of emotions.
When I publicly stated a couple months ago that I wanted to start painting bigger pieces, I had no idea that within just a few weeks I would be creating a piece almost 20 times larger than what I usually paint. Had I known that was going to happen I would have also stated that I wanted to start eating bigger cookies and making more money but hindsight is always frustrating.
Nonetheless, I was invited to participate in the tenth anniversary of the POW! WOW! International Mural festival in Hawaii (curated by artists Jasper Wong, Jeff Gress & Kamea Hadar), which is something that I had always fantasized about being a part of, so I jumped at the challenge, knowing DAMN WELL that there would indeed be an emphasis on CHALLENGE. Before this opportunity, I had only painted a large scale mural one other time in St. Petersburg, Florida in 2017, so almost EVERYTHING was going to be a pretty new challenge for me.
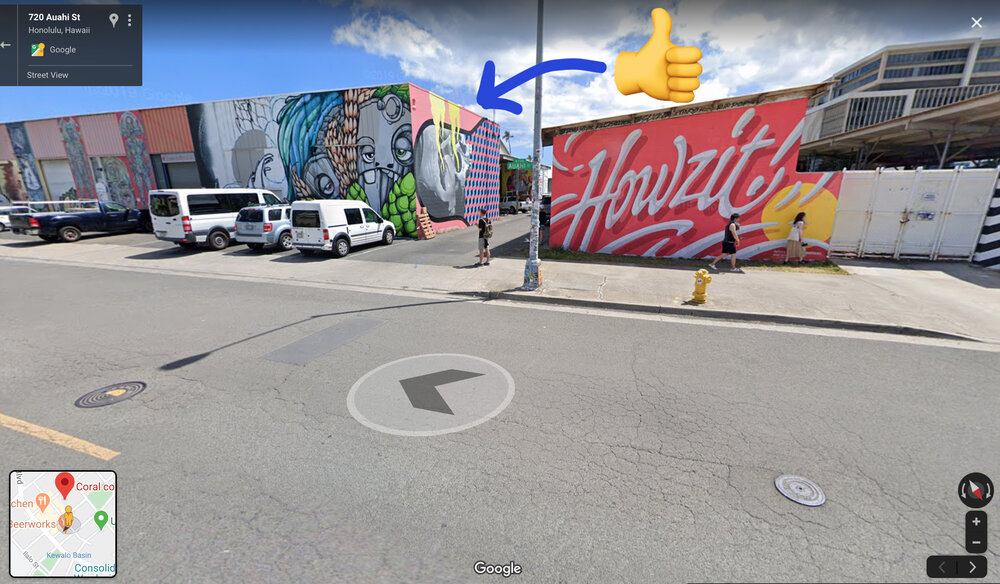
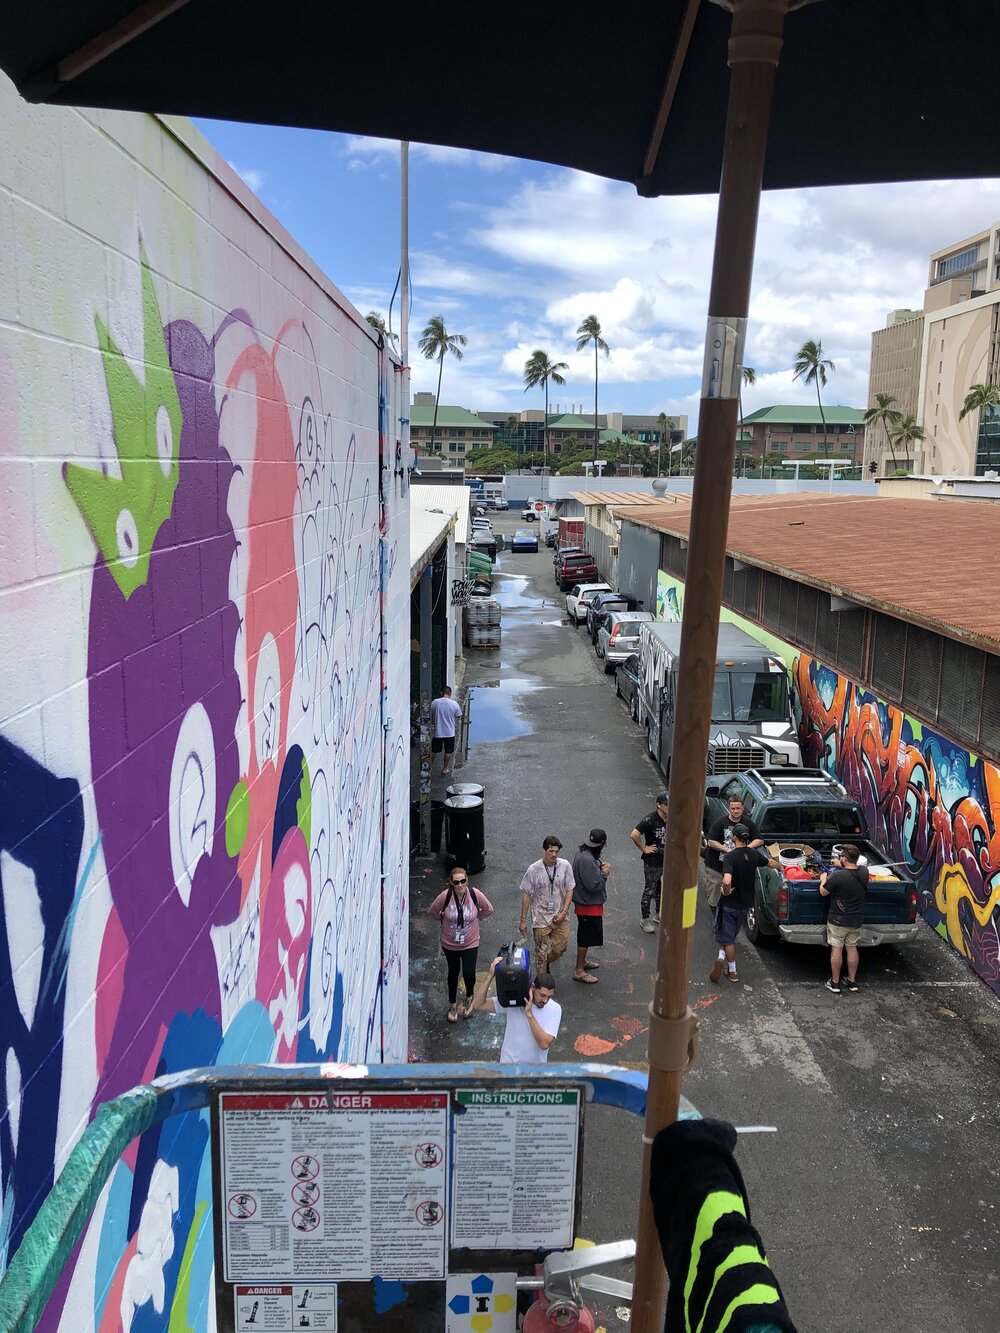
Luckily, or rather, overwhelmingly, I had to give my list of top 10 wall options I would be ok with painting out of a selection of 100. Yes, that’s right, POW! WOW! had 100 murals going up all over the city of Honolulu at the same time. It’s amazing. So, using my small amount of past experience to know what type of wall that MIGHT work, Chloe and I walked around downtown Honolulu on Google Street View so that I could actually see what obstacles might be present in some of the walls. After about a 2 hour virtual tour of last year’s murals on google and doing detective work to assess what the surface of the wall would be and the type of problems I might face, I narrowed down my choices, with my top pick being right about…here, where a magical mural from Michael Reeder sat, courteously offering its skin to me as a sacrifice to paint over. Thank you, Michael, for your offering. You will be rewarded with the gift of one sack of neon snake blood arriving in your mailbox in approximately 13 days.
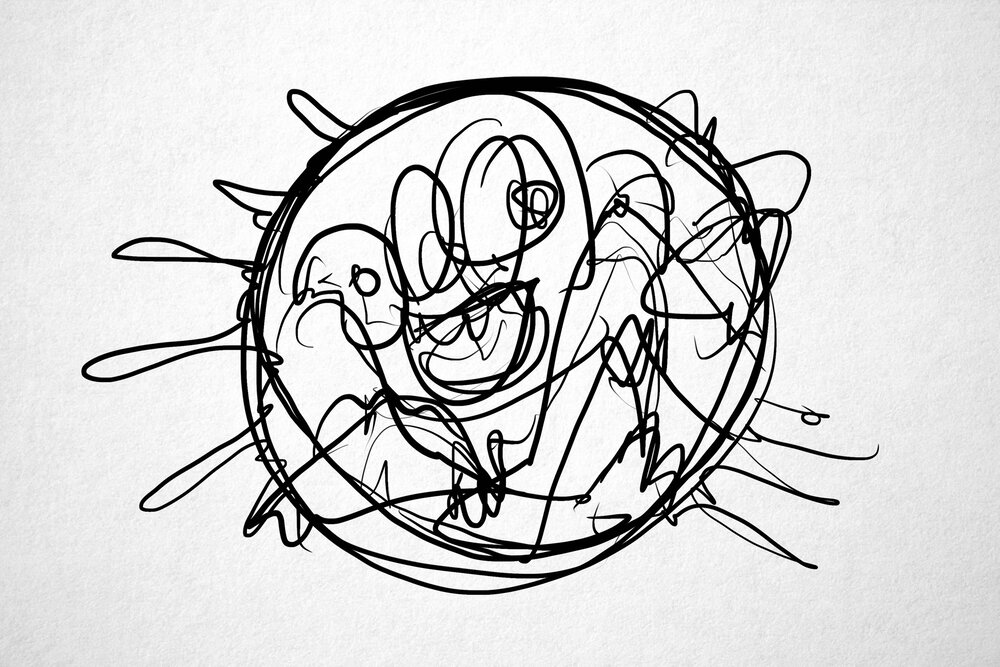
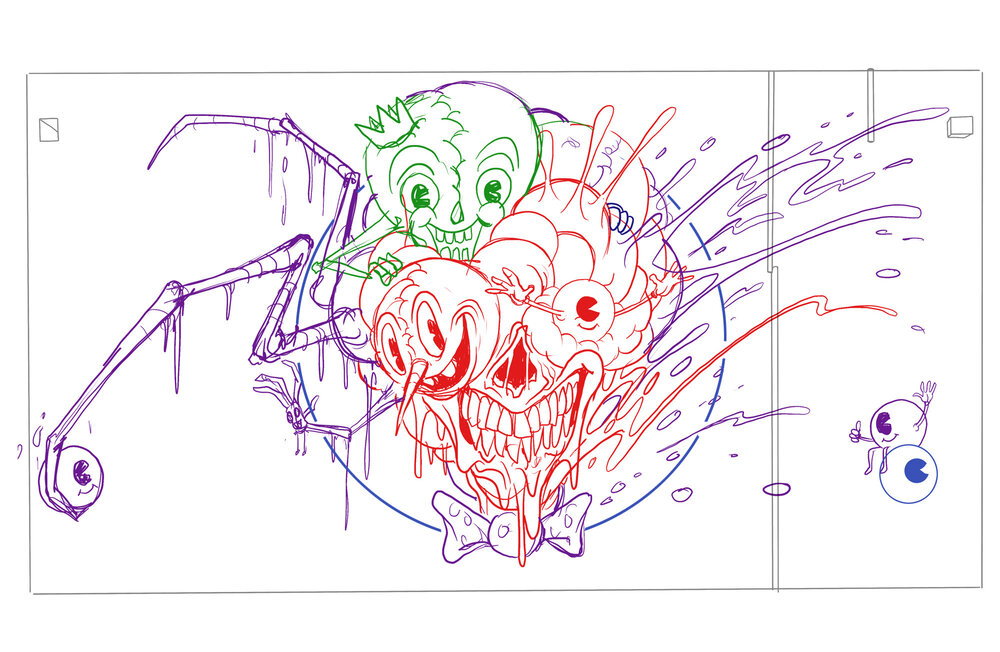
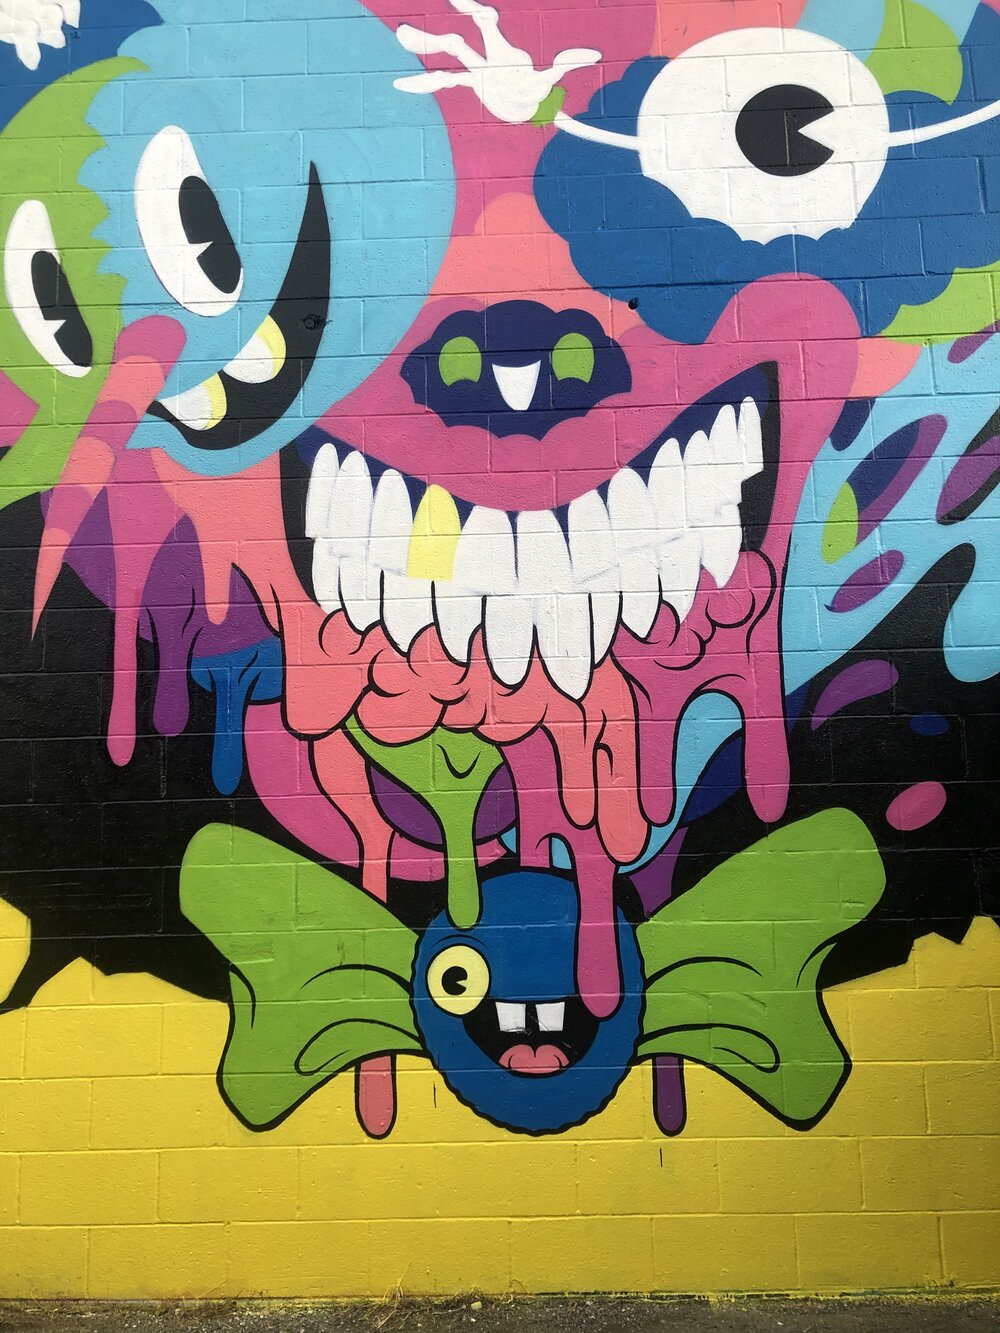
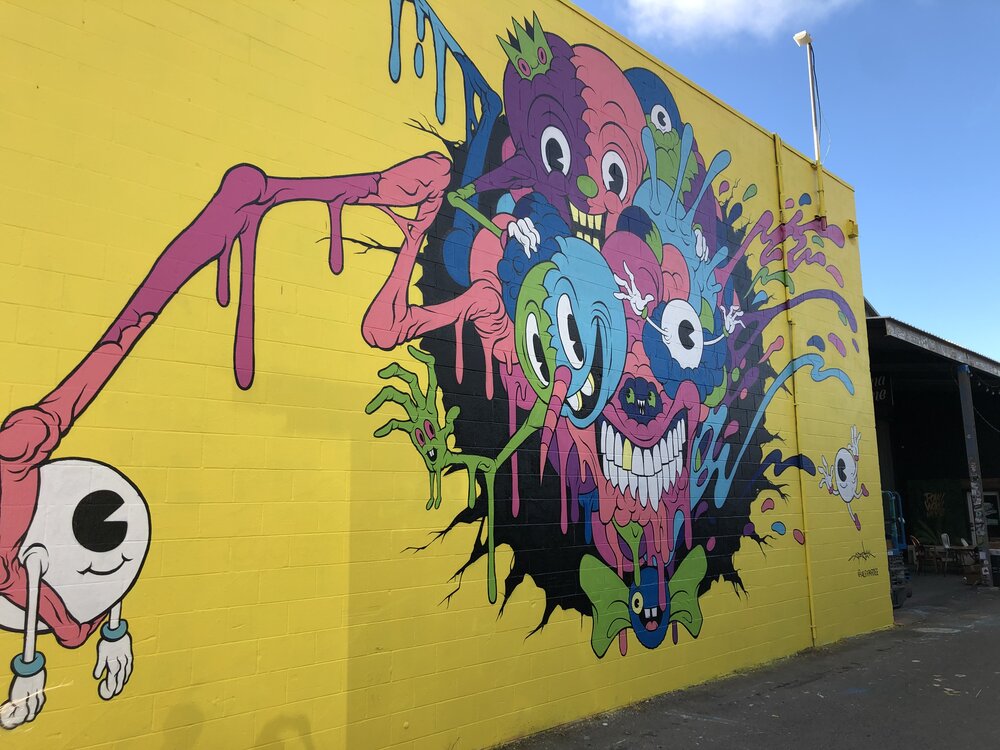
After selecting my wall, I had to scribble something to paint on it. Since I hadn’t done a lot of large scale pieces, my intention from the beginning was to make the final mural look like one of the animation-cell-style drawings of mine that I have been doing recently, just….a lot bigger. That means that I would be creating bigger shapes, and most importantly, creating thicker line-work than normal due to the scale. So I started scribbling. As with almost everything I do I scribble a shape that I like on a piece of paper in like 22 seconds and then I force myself to make something cool out of that shape.
Here’s the very first scribble on paper.
Then I took a photo of that paper on my iPad and dropped it into the Procreate App on top of a proportionate diagram of the dimensions of my wall, so I could sketch to proper scale.
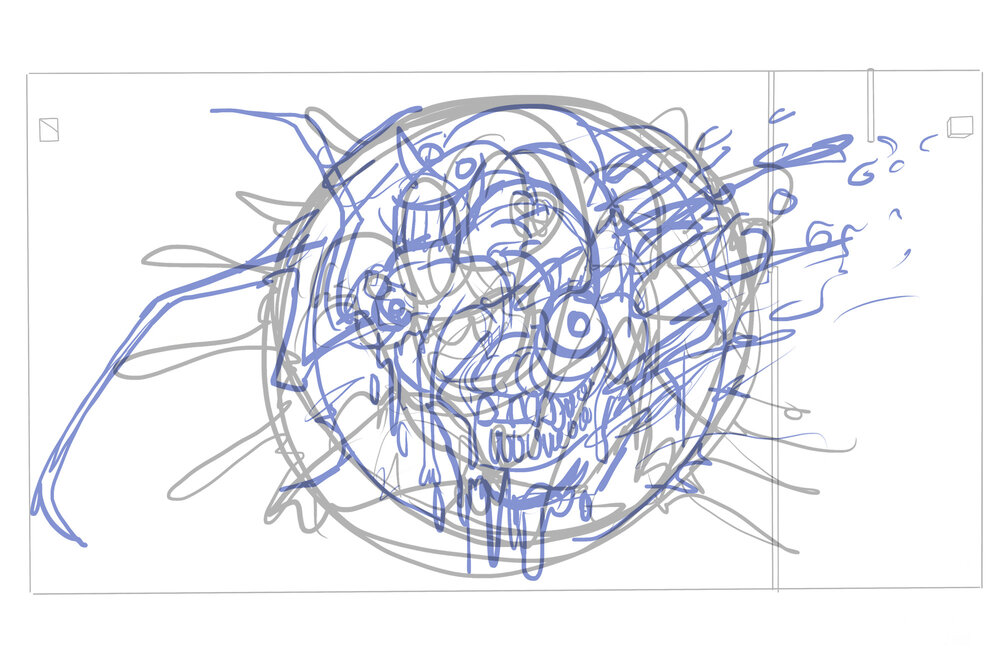
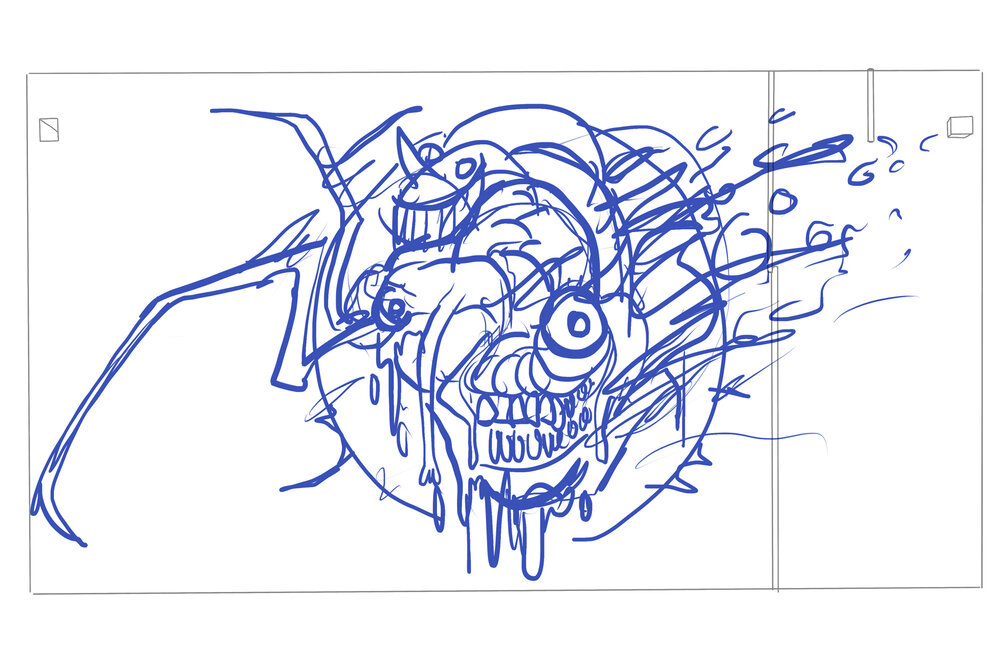
Then I revise, and revise, and tighten the sketch until it makes me smile for reals.
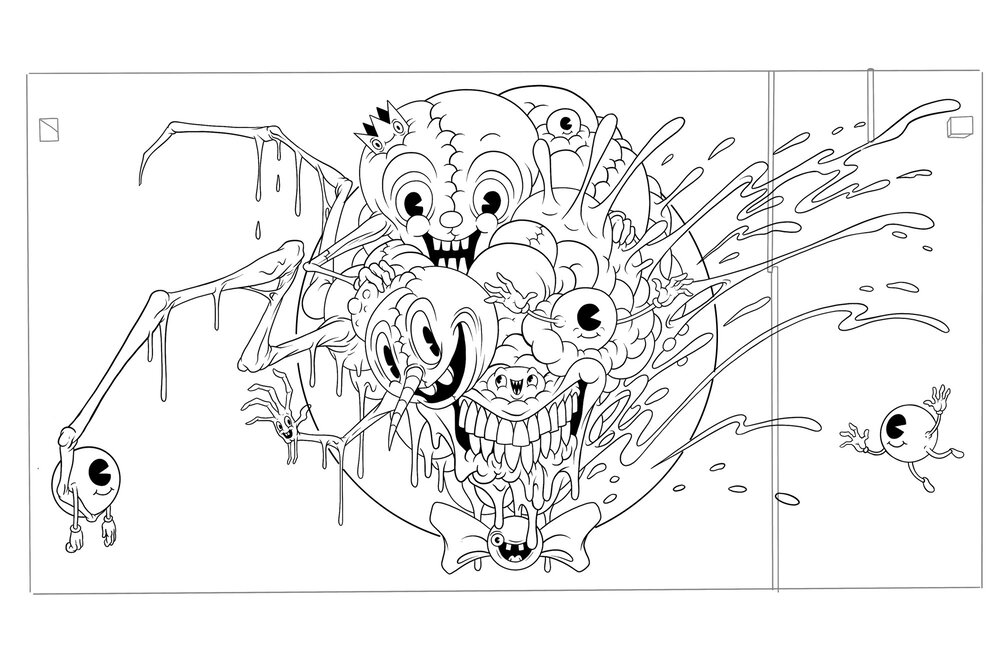
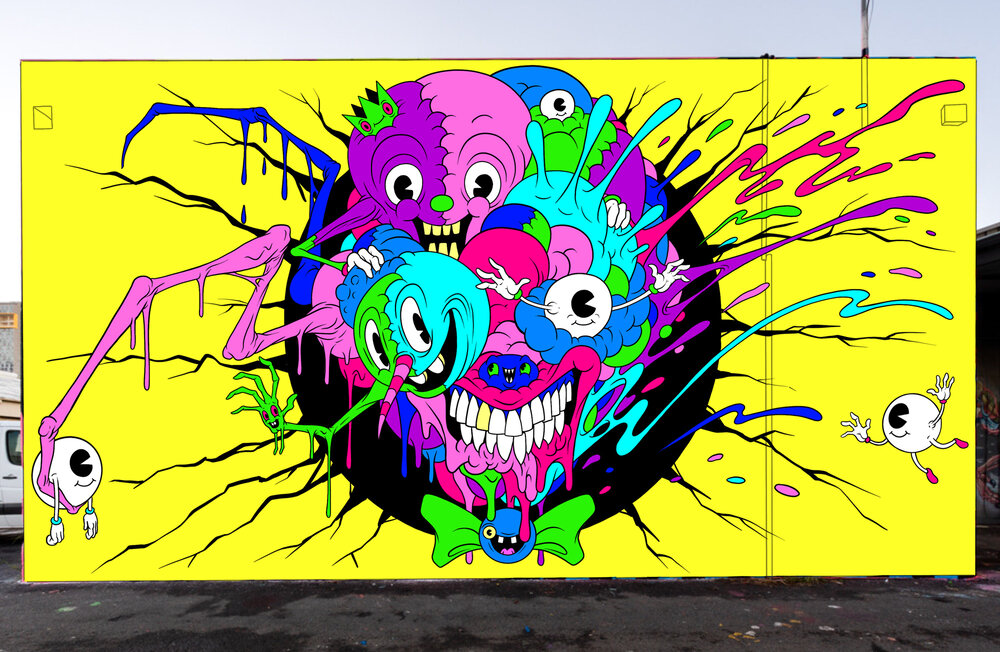
Then comes the color mock-up and compositing onto a photo of the wall to see what it will hopefully look like. Now I have a mission to try to accomplish: make this look like this but bigger.
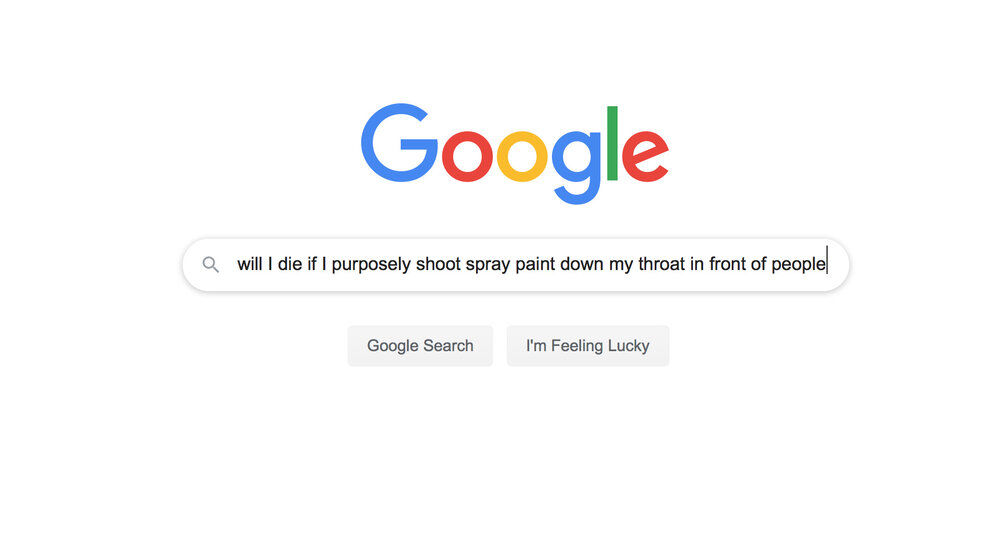
Next step is pre-stress, where I irrationally stress out for 3 weeks until I arrive in Hawaii, in which case during those 3 weeks I was testing out brushes, spray paint, and researching things like “will I die if I don’t finish this mural in time” and other searches like “will I die if I purposely shoot spray paint down my throat in front of people for attention to overcompensate for the fact that I don’t know what I’m doing?” None of it helped me prepare but it felt like I was being productive.
So, once I arrived in Honolulu it was time to eat 17 bowls of Poke to pass the time until it got dark and I could start on transferring my sketch to the wall using a projector.
Before this mural, I had never used a projector to transfer anything (although I have tried and failed numerous times) and I was curious about any other methods of transferring that other artists use because this is a step that is rarely shared but really important. Some artists use a grid method, some artists use projectors, and one of the more fascinating and logical methods was shown to me by Tati Suarez, called a scribble method, or a doodle method, where you randomly scribble shapes all over your wall and then photograph that, digitally overlay your sketch, and then use that for reference to draw directly on the wall. It’s like a non-square grid method and I loved seeing it in action. Here’s a couple of photos of Tati working on her transfer.
With a projector, however, loading a high res image onto a laptop computer and plugging that computer into a projector at night (or in a dark room) you can project the image directly onto the surface you are painting and literally trace it carefully.
However, we already had a couple obstacles going into the transfer of my sketch. The first obstacle was the size. Not too many consumer-grade projectors can project something over 40 feet wide and over 22 feet tall. Luckily Jeff Gress had 3 different projectors on hand to try until we landed on an Epson model (I’m not sure which one, but I think THIS ONE is similar)
The next huge obstacle was the fact that in order to project something that large, you need to stand FAR away, but my wall was in an alleyway, so we physically couldn’t stand far enough away. Instead, we had to project it from an angle. However, when we did that, it was obviously distorted and inaccurate. So we opened photoshop, projected the (now distorted) image, and manually distorted and warped the image on photoshop enough to trick the laws of physics into making the image look correct on the wall. These photos probably don’t make much sense but this is what it looked like.
![]()
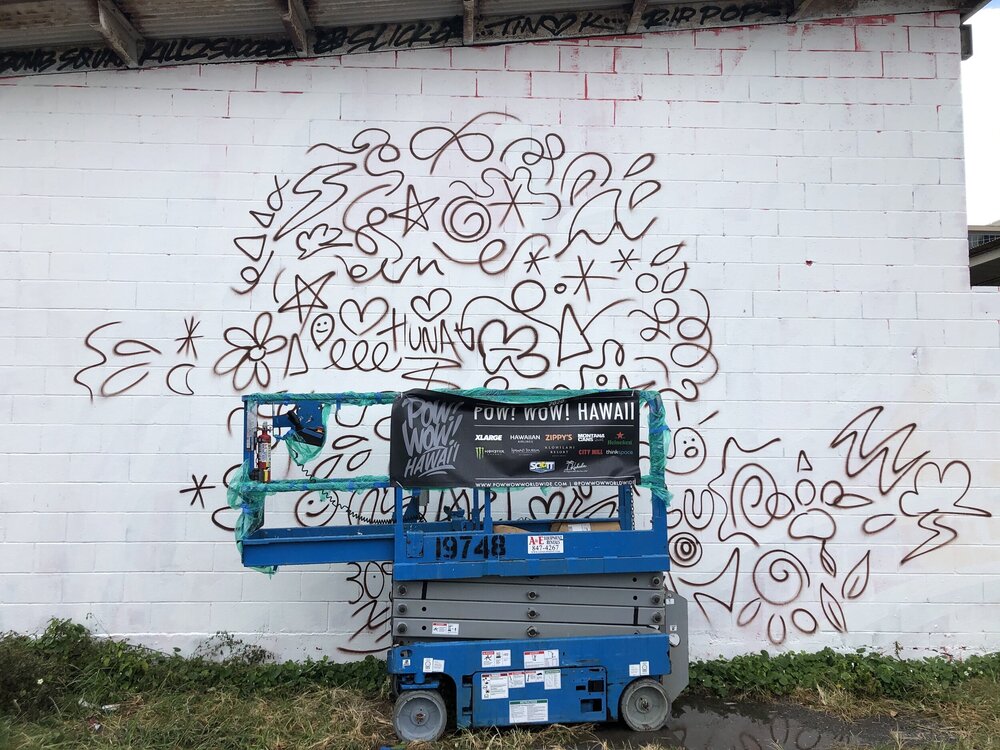
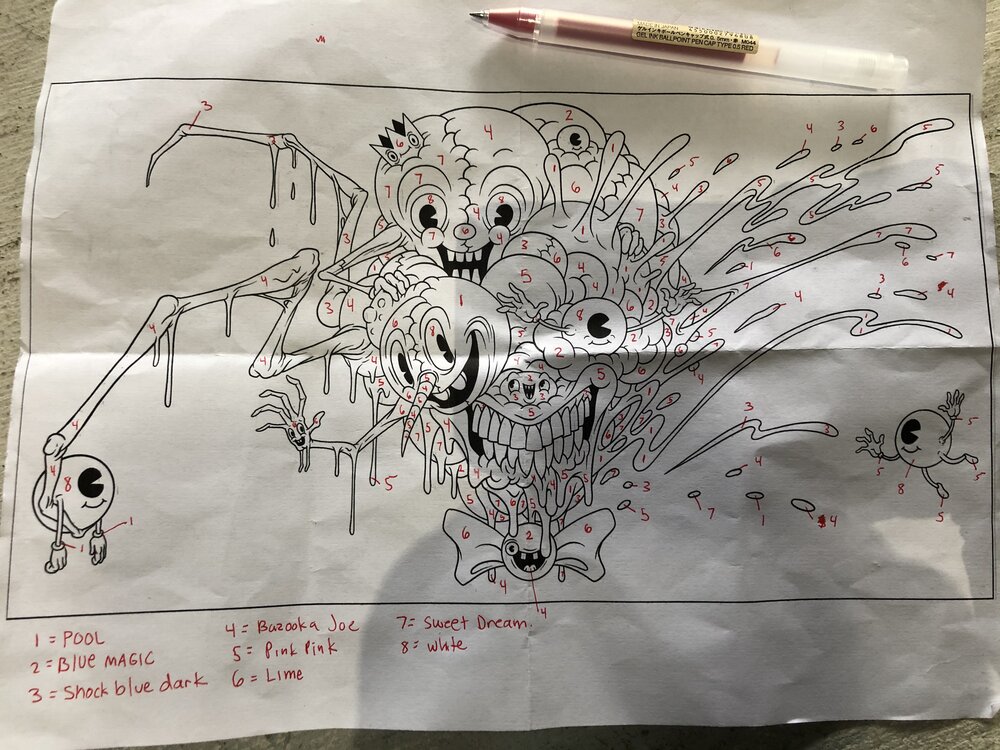
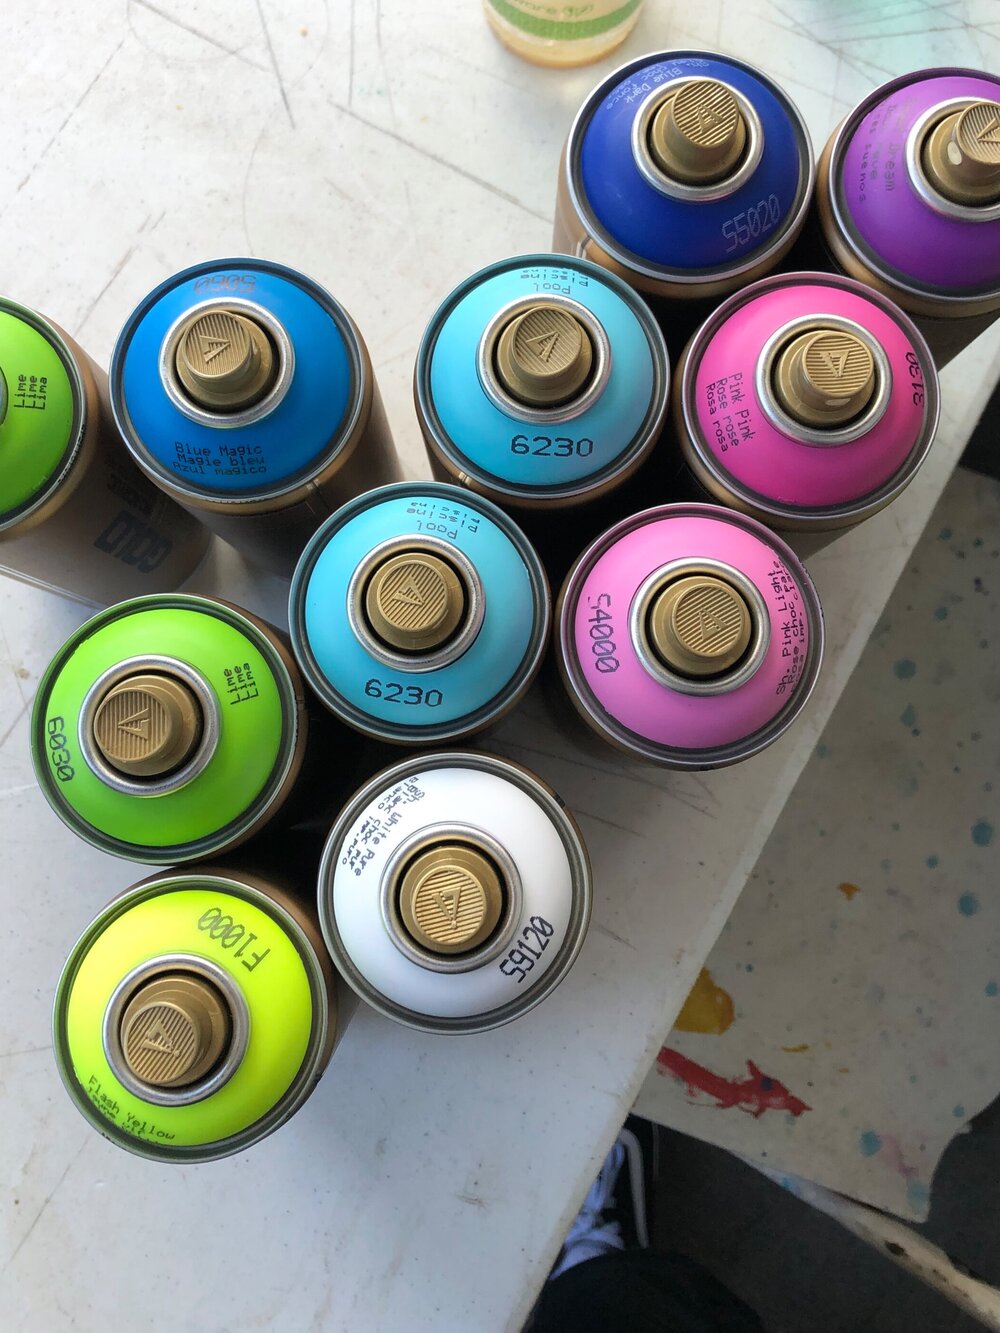
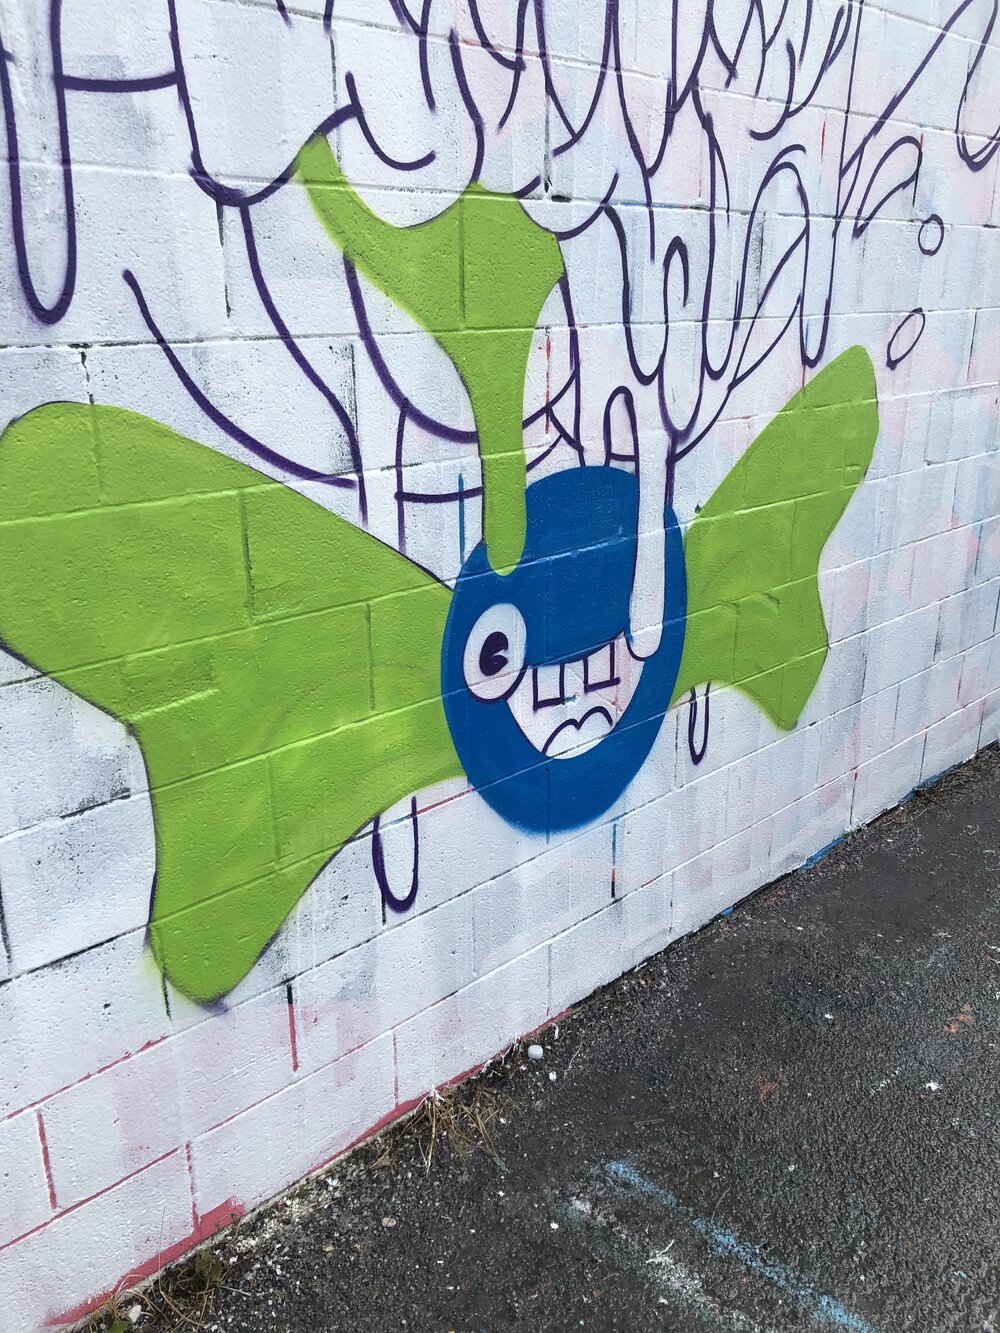
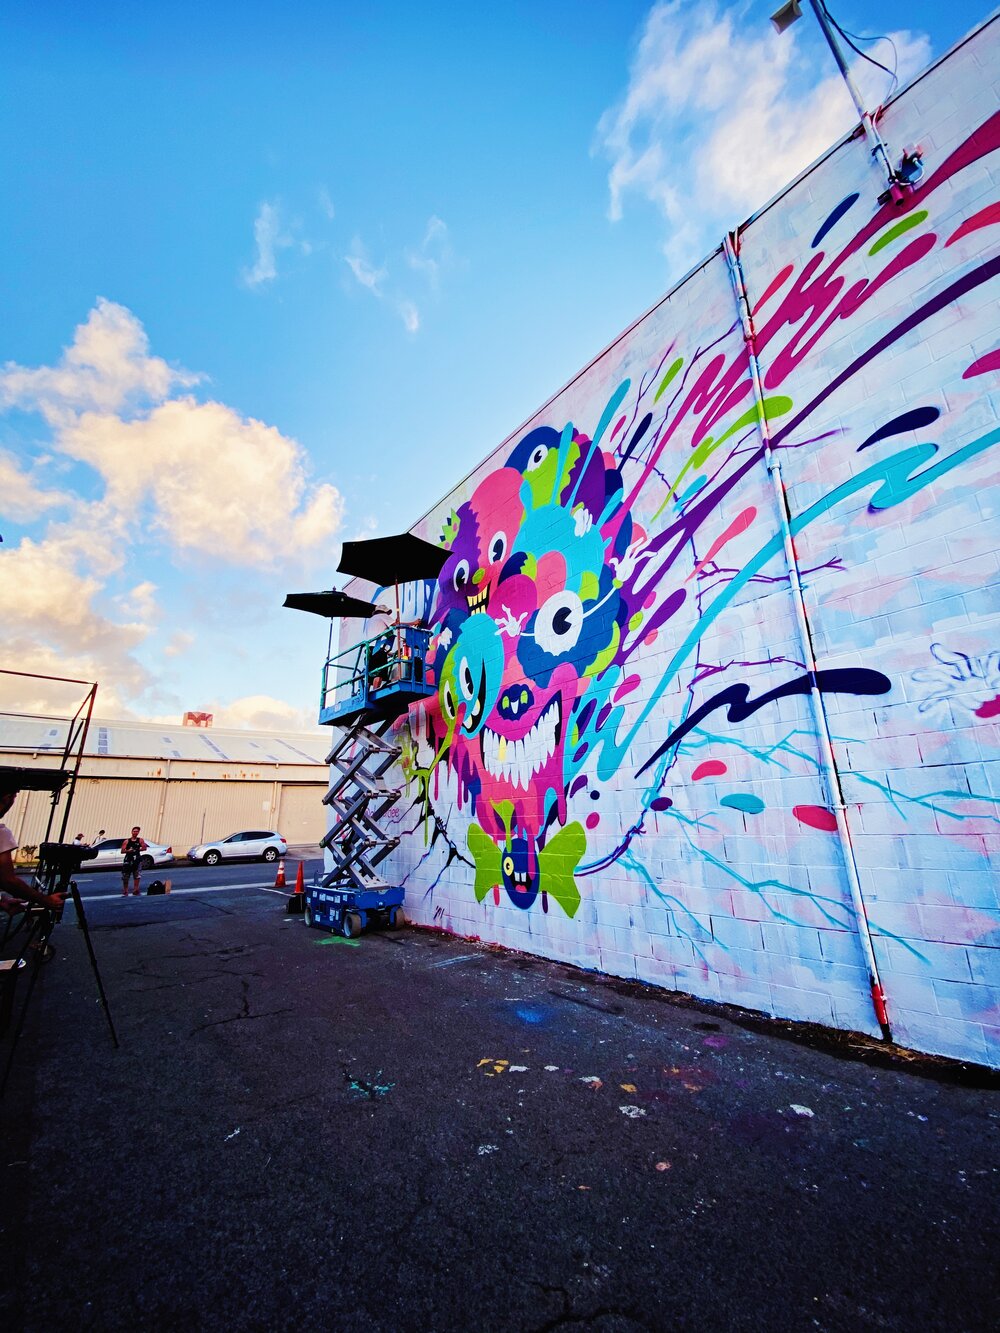
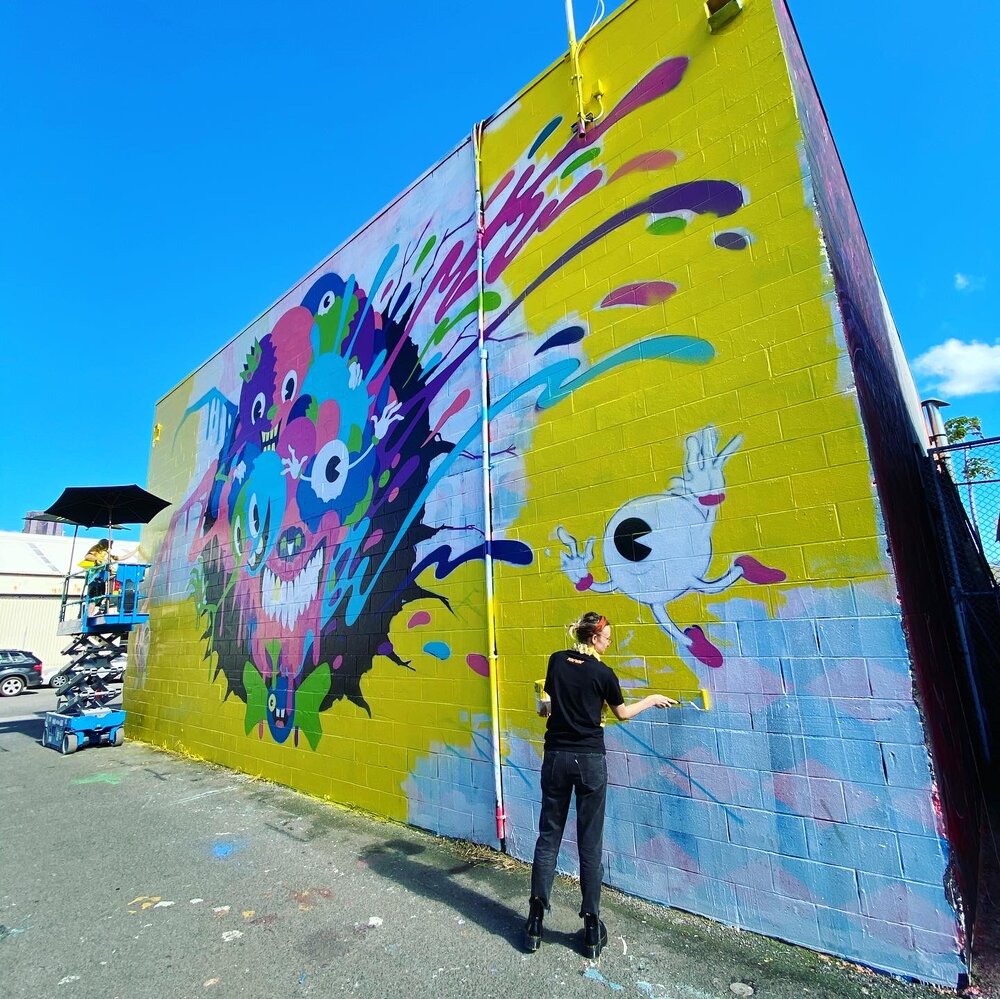
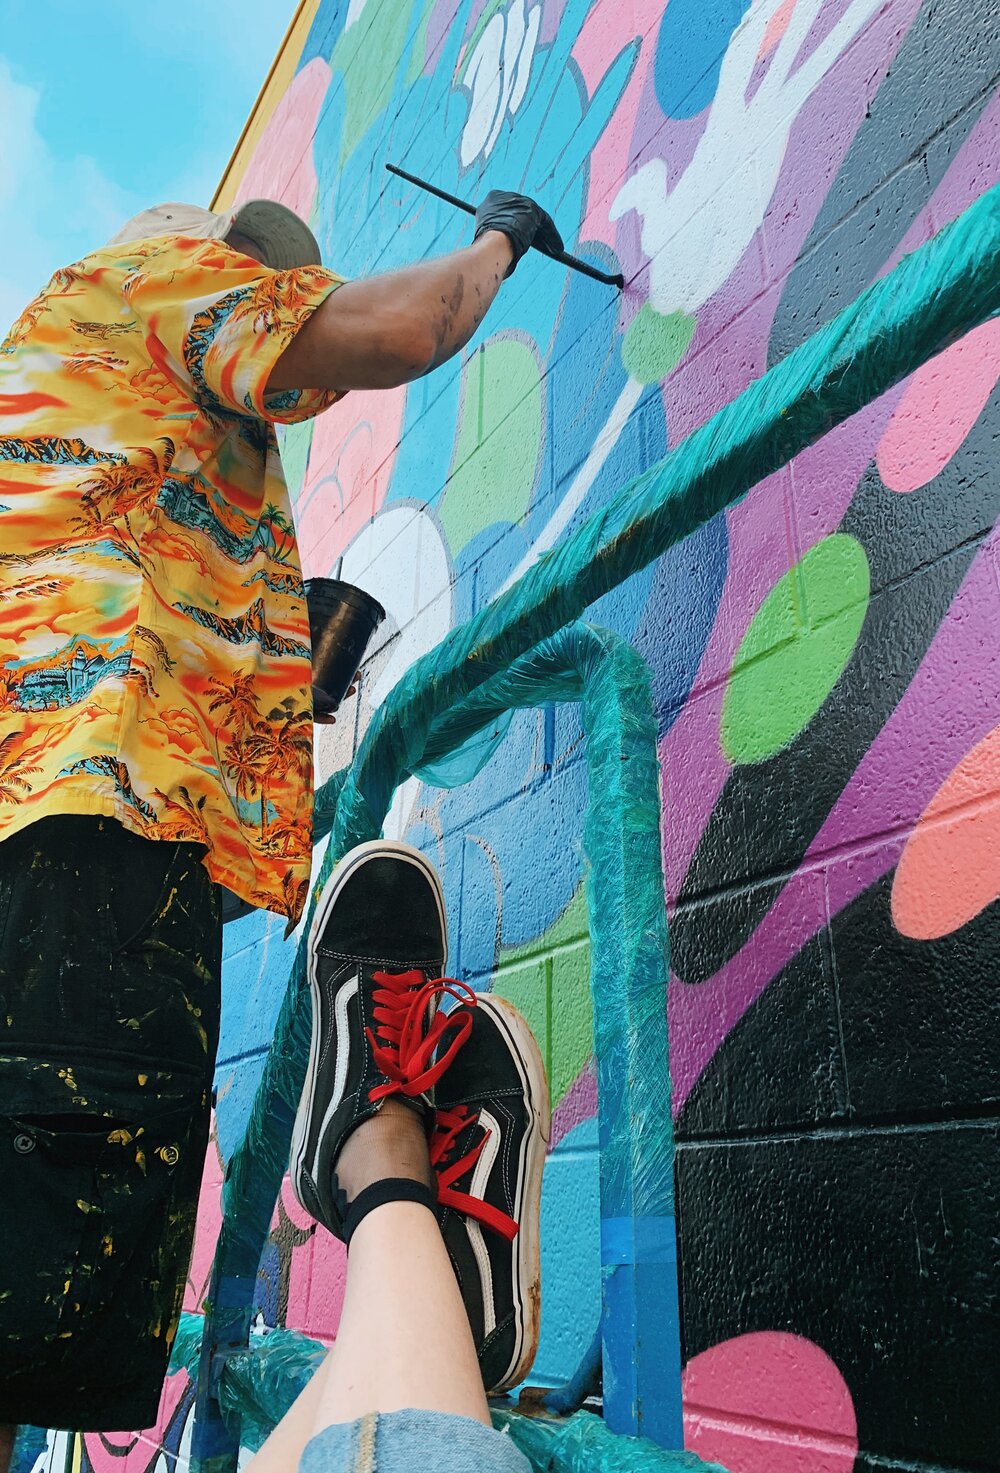
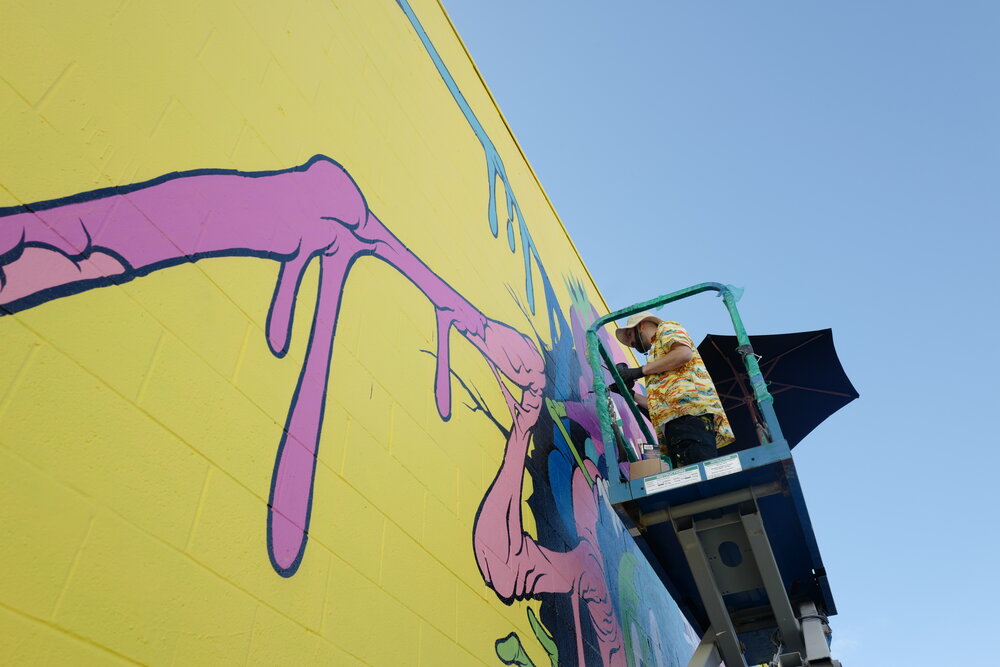
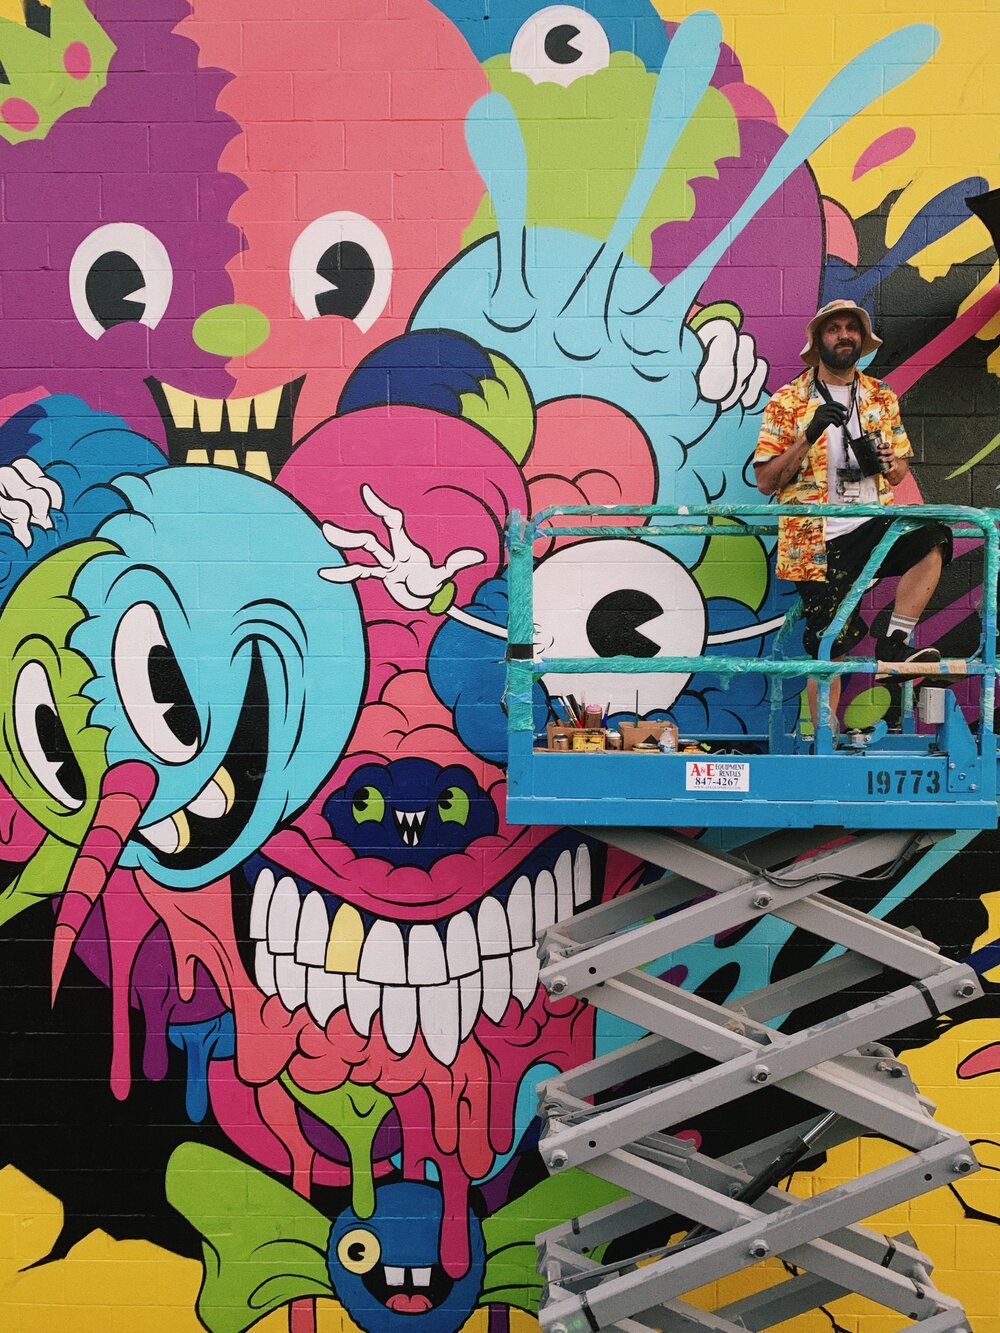
The following 3 days consisted of simply (well, not so simply given the unpredictable weather, going up and down on the lift, and the wind and Hawaiian sun) filling in the sketch lines with Montana spray paint like a giant coloring book, using my color-key instructions so I didn’t have to think creatively for 3 days which was nice.
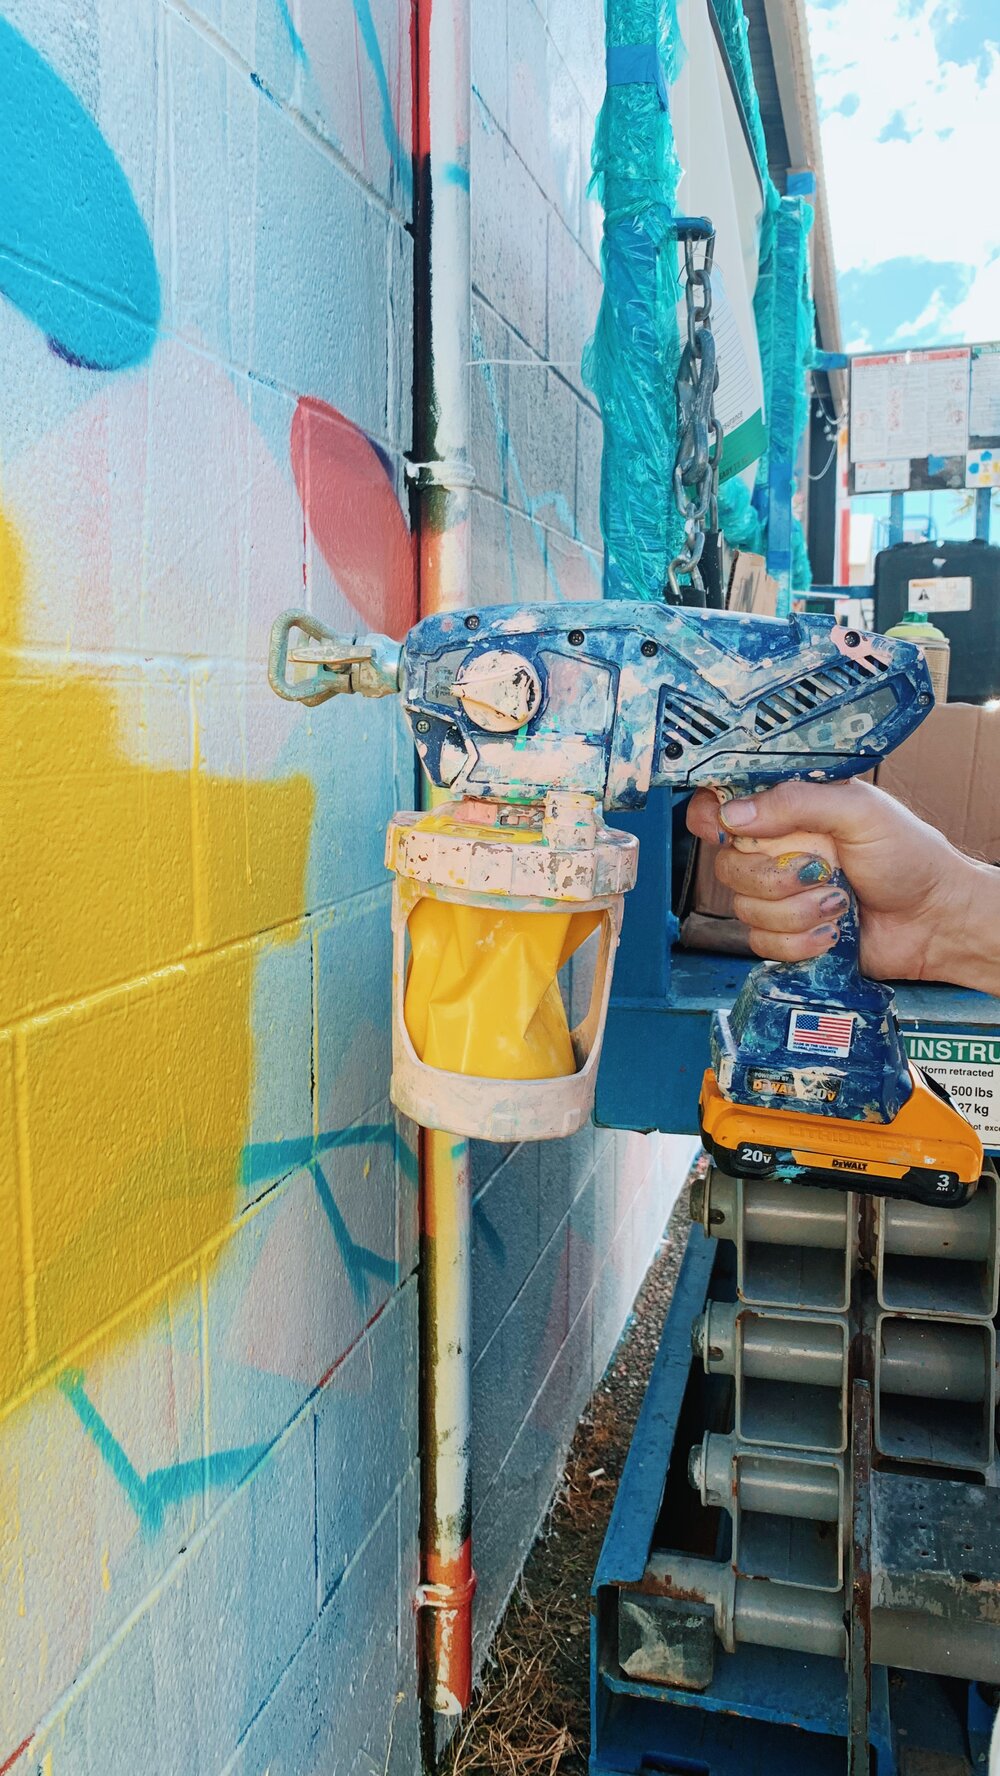
Also nice, just when I thought I was going to spend Valentine’s Day on Fantasy Island without my Valentine, Chloe showed up in Hawaii and helped Rocom and I cover the background in gallons of exterior matte yellow house paint and hang out with me on the lift as the best Valentine’s Day date. Once again, in hindsight, painting the entire wall yellow before even transferring the image in the beginning would have been ideal, but I was trying to conserve paint (next time tho…).
For a majority of the yellow paint, we used this whimsical cordless paint sprayer along with some rollers and brushes.

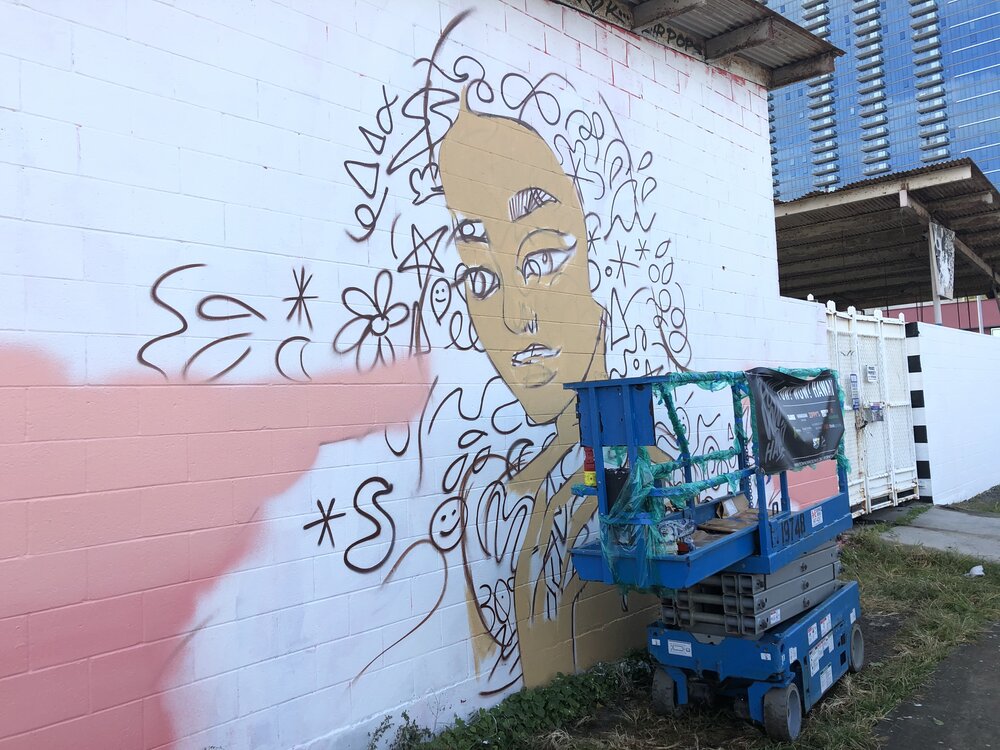
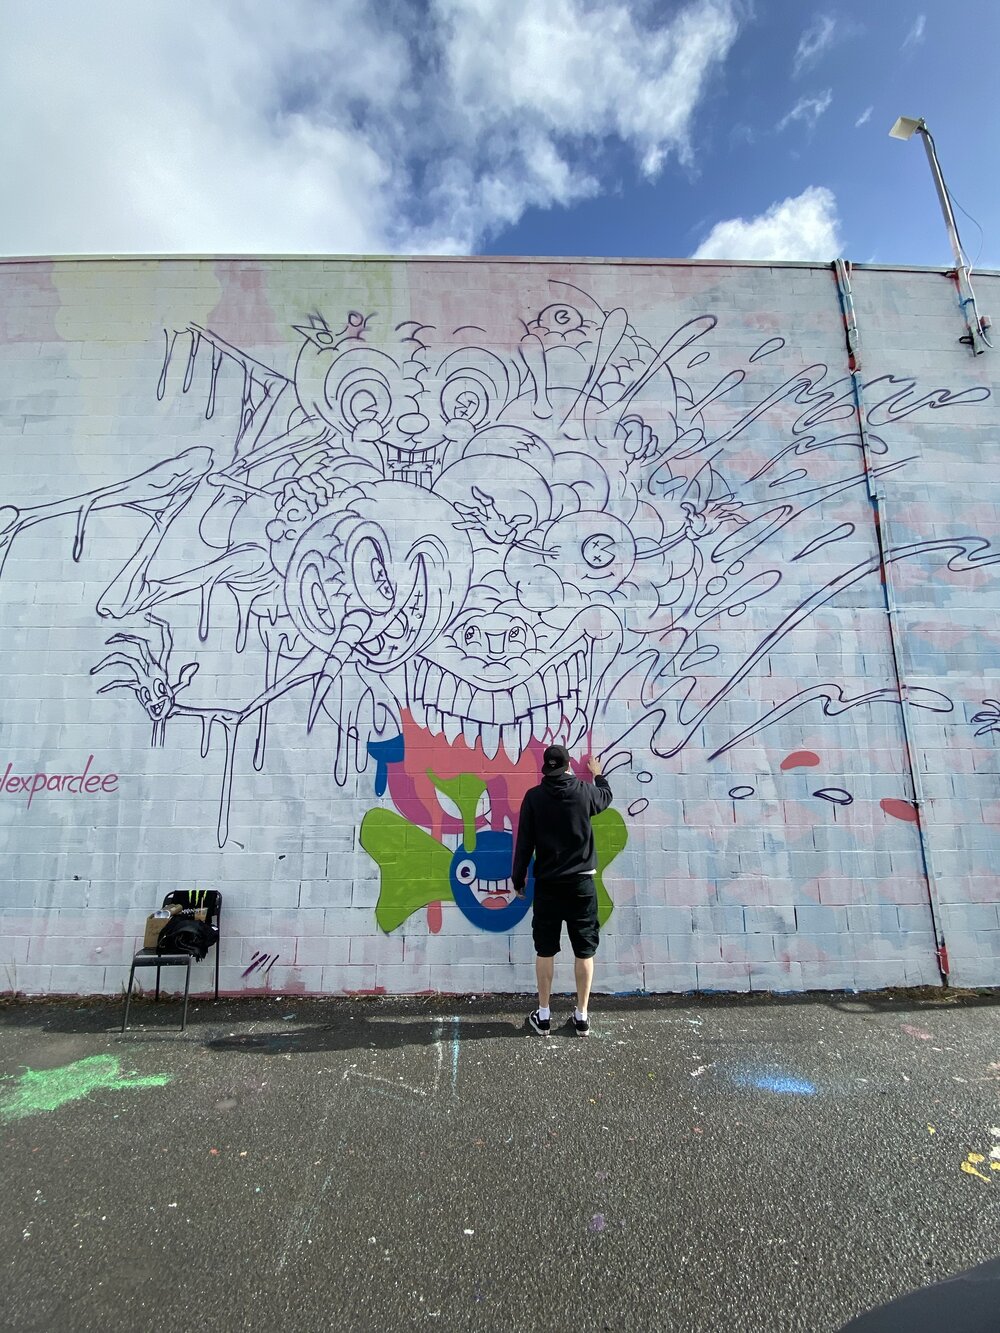
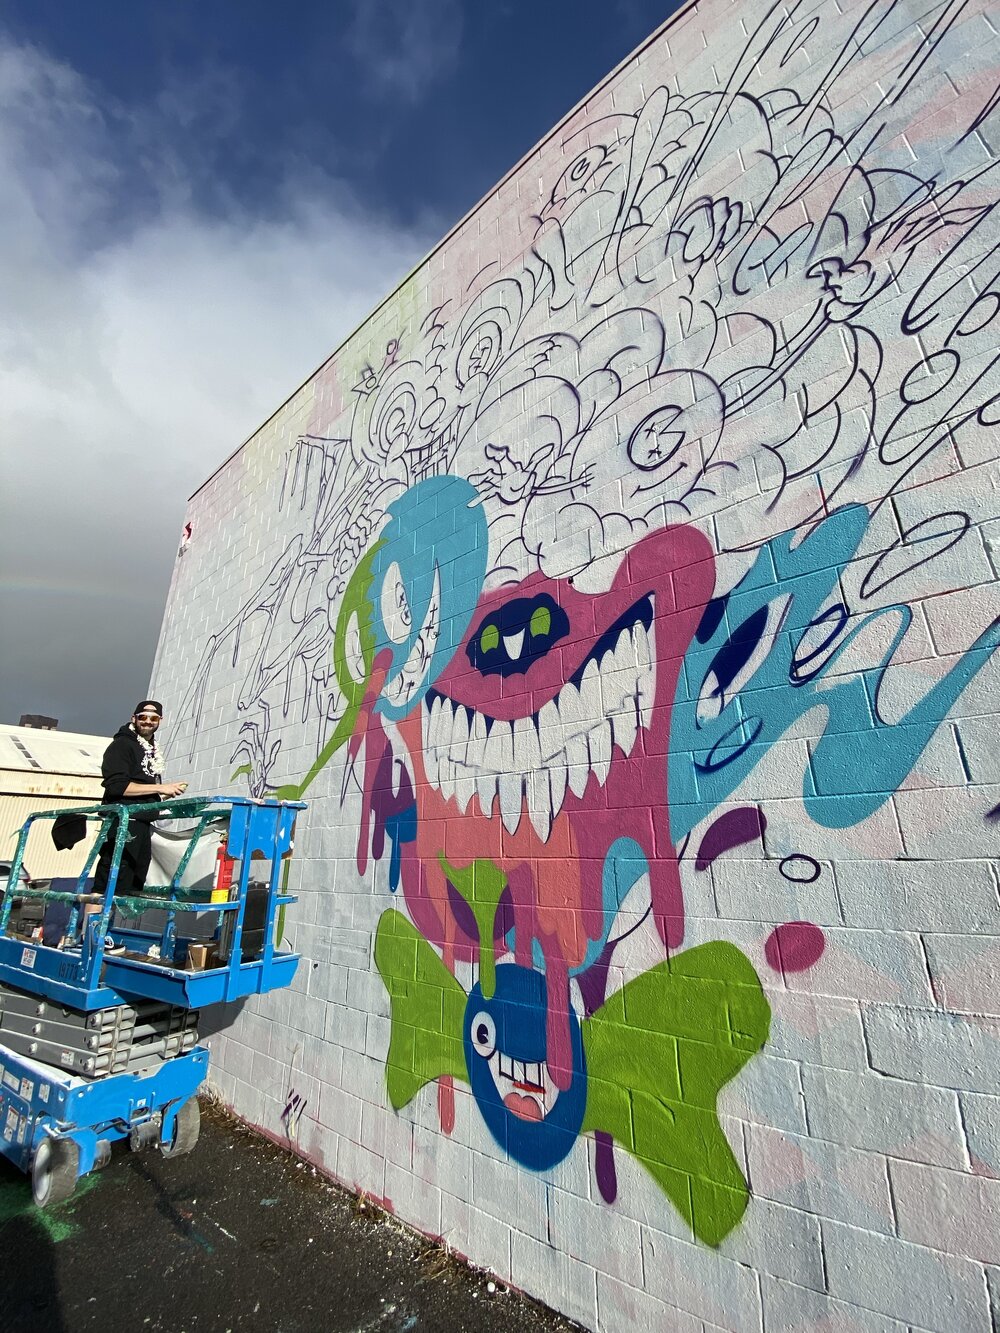
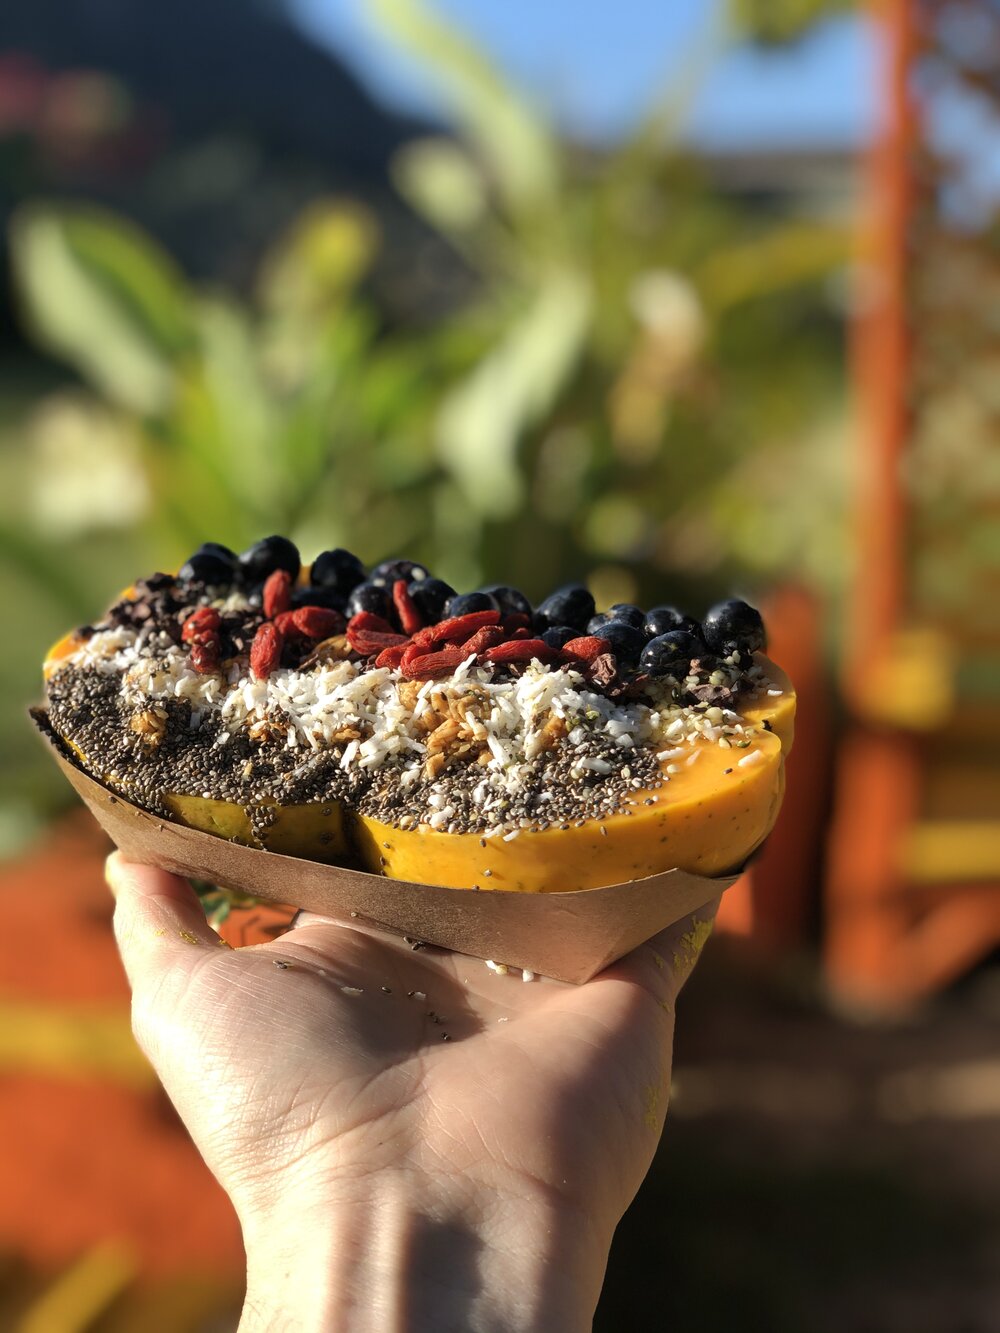
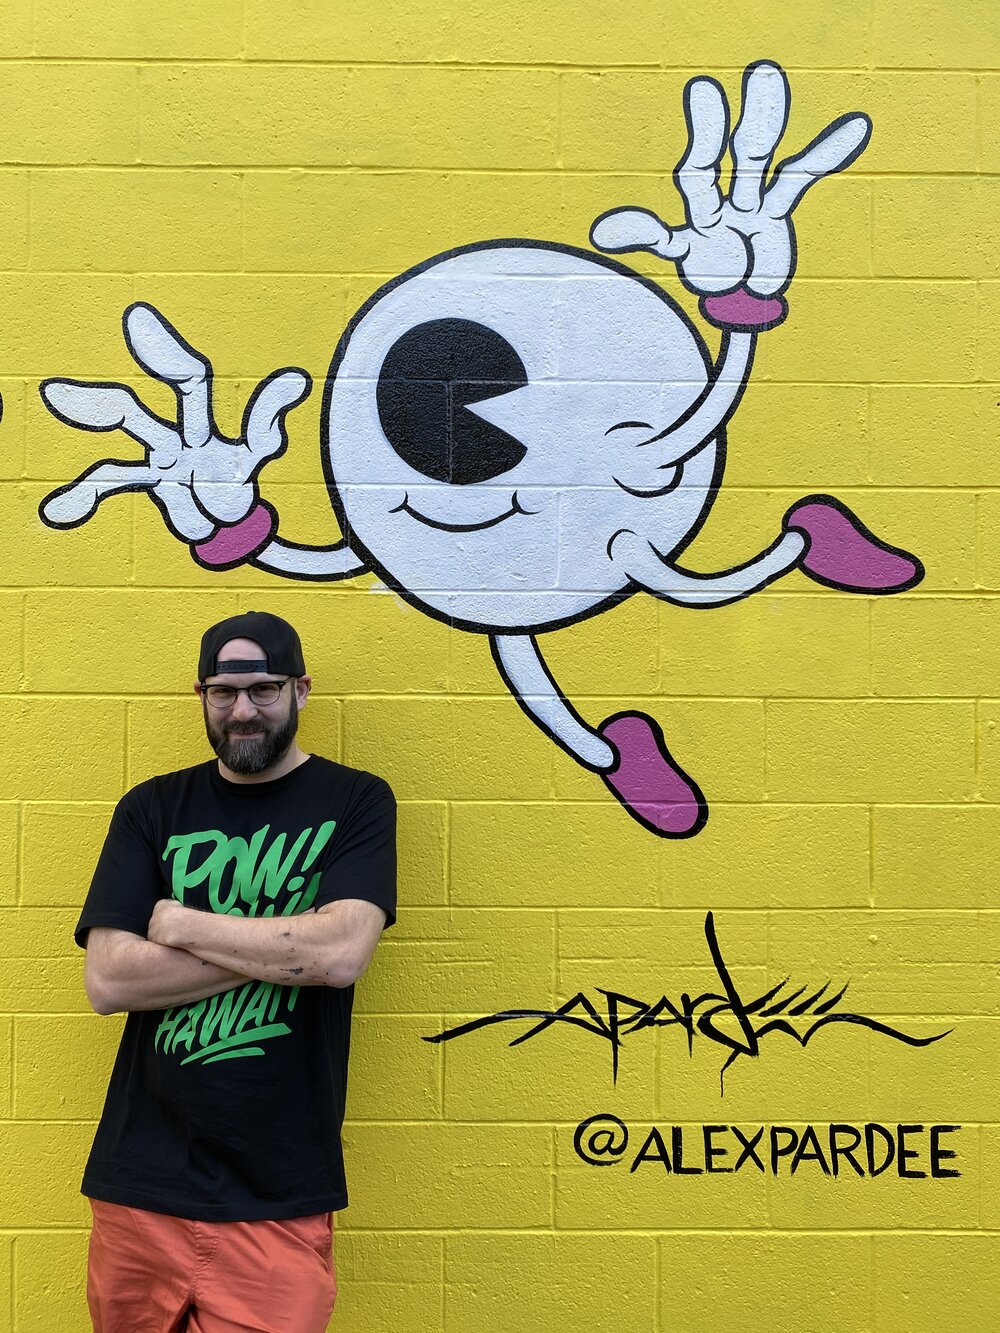
With the background and main fills complete, it was time for me to start the part I had been waiting 4 days for: the outline, but first, drive all the way to the North Shore to eat PAPAYA BOWLS!
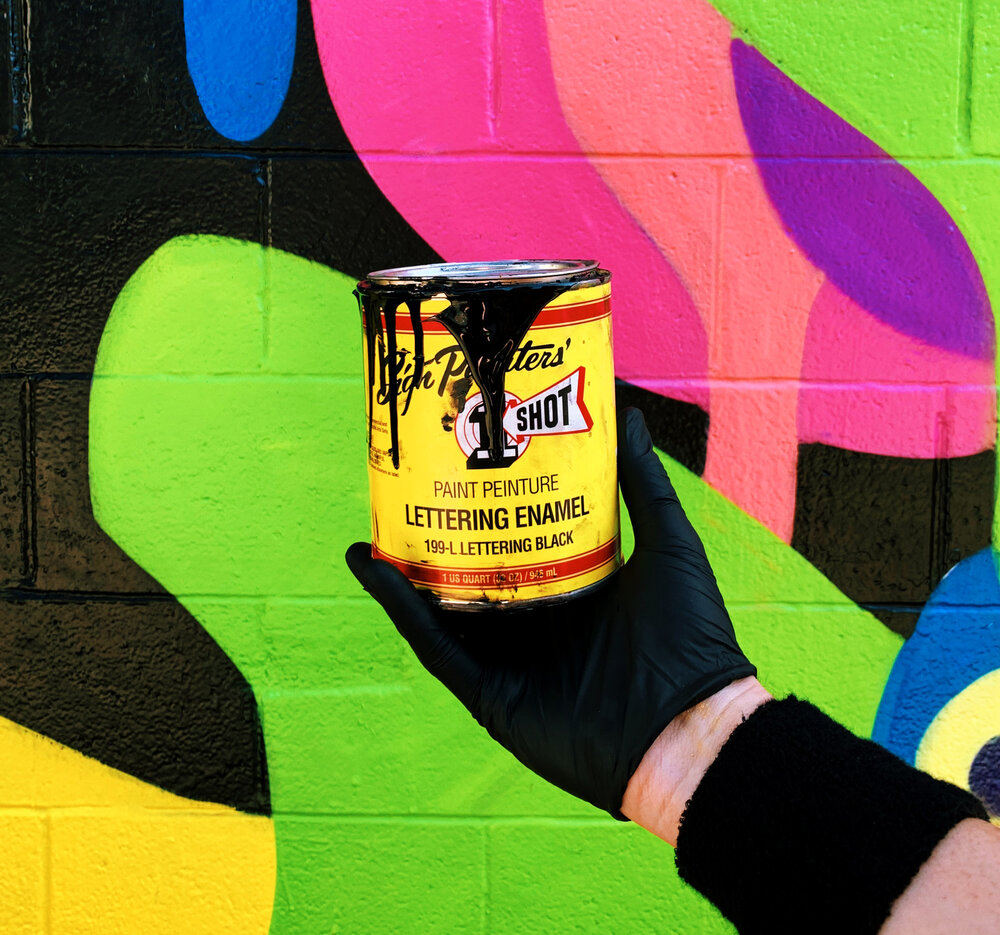
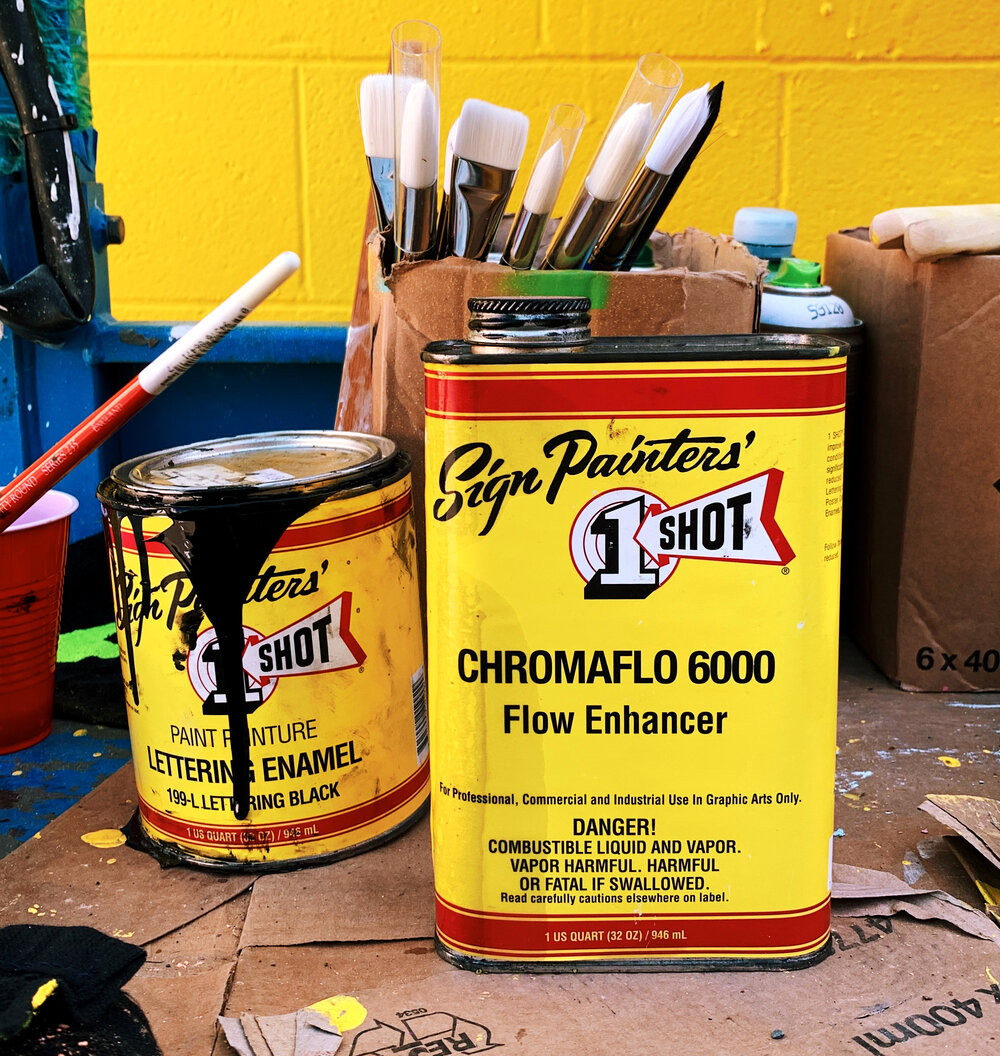
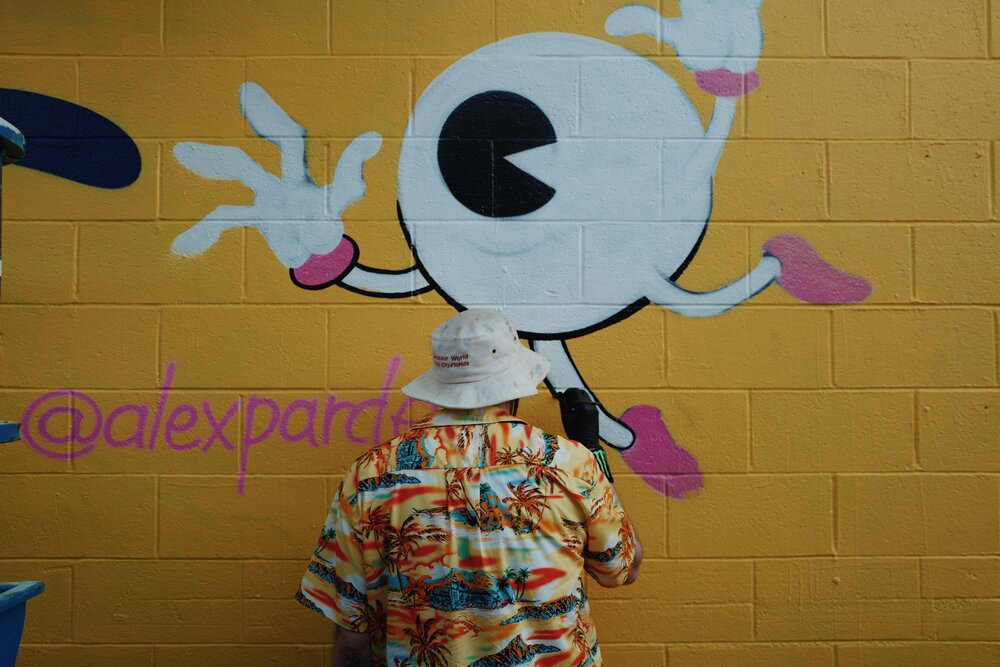
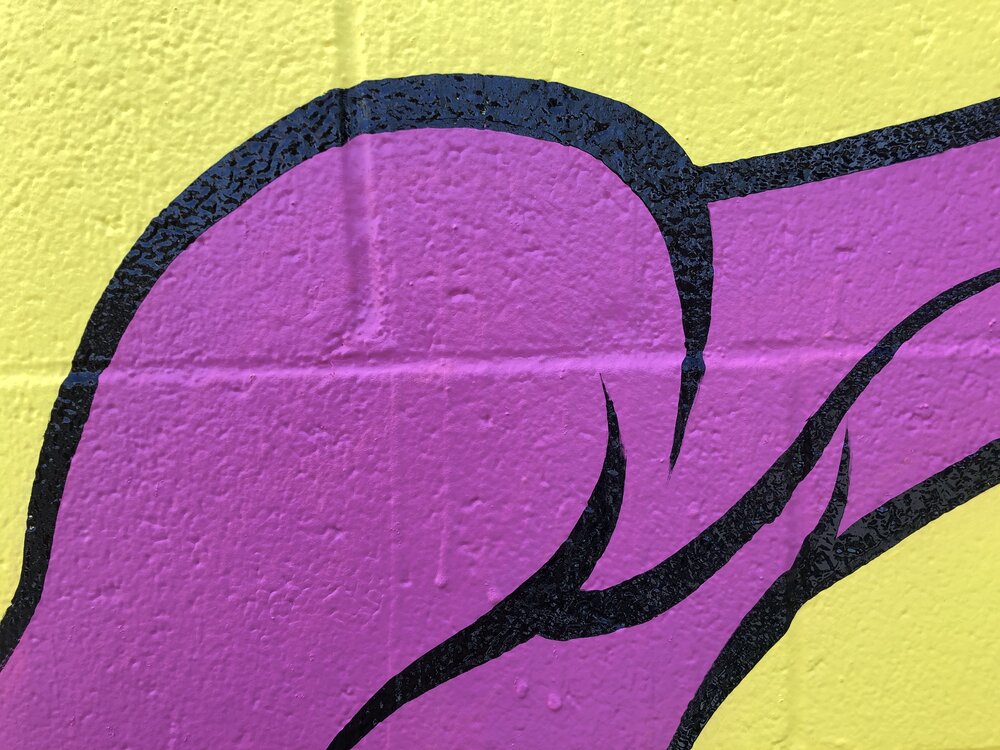
Black line-work has been the most consistent thing about my artwork for over 20 years, but depending on the material I’m painting on depends on what kind of black ink/paint I use. Sumi ink, speedball ink, acrylic ink, and acrylic paint are all typically what I use for my black lines, but since this is such a huge wall with such a rough texture (not to mention the sun beating down on it forever) combined with the fact that I wanted this mural to ultimately look like a giant animation cell, I decided to use ONE-SHOT lettering enamel for the outline. I have a little experience with One-Shot so I was well aware of the additional challenges that come along with using it (it’s a thick paint that requires thinning using a reducer, which makes it drippy and runny, and the climate and temperature determine the viscosity of the paint, not to mention that it ruins brushes rapidly) so I don’t recommend using it without experimenting with it a bunch first, or if you don’t have time to be patient. I knew ahead that I would need at least 20 hours to complete the outline (I think it took me about 22). Anyway, I like torturing myself and repeatedly answering the same question of “why are you using that for the outline” so I was excited to use it.
And so, the outline began…
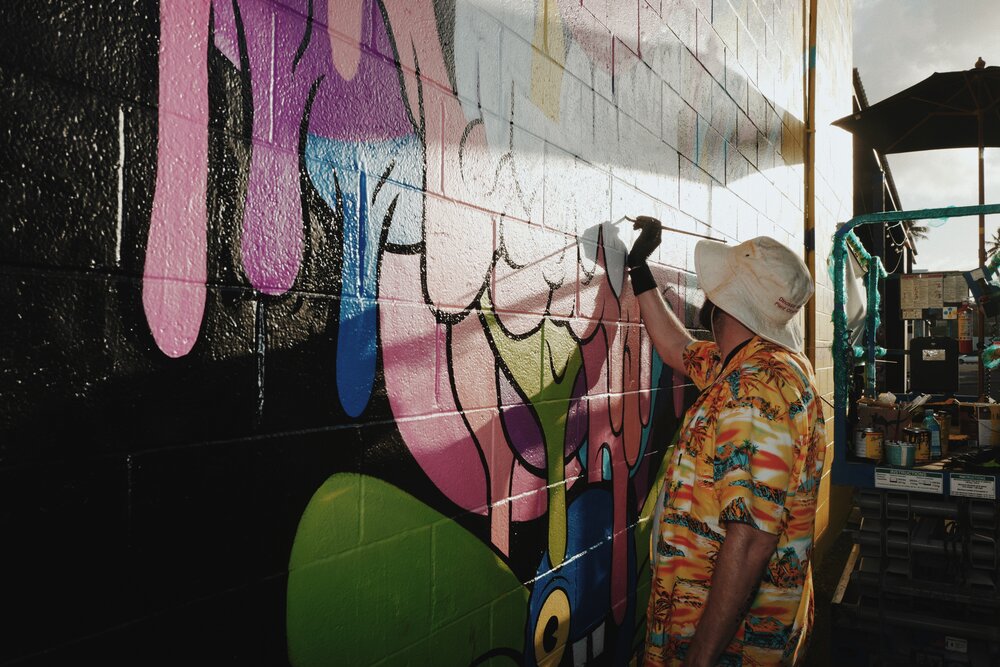
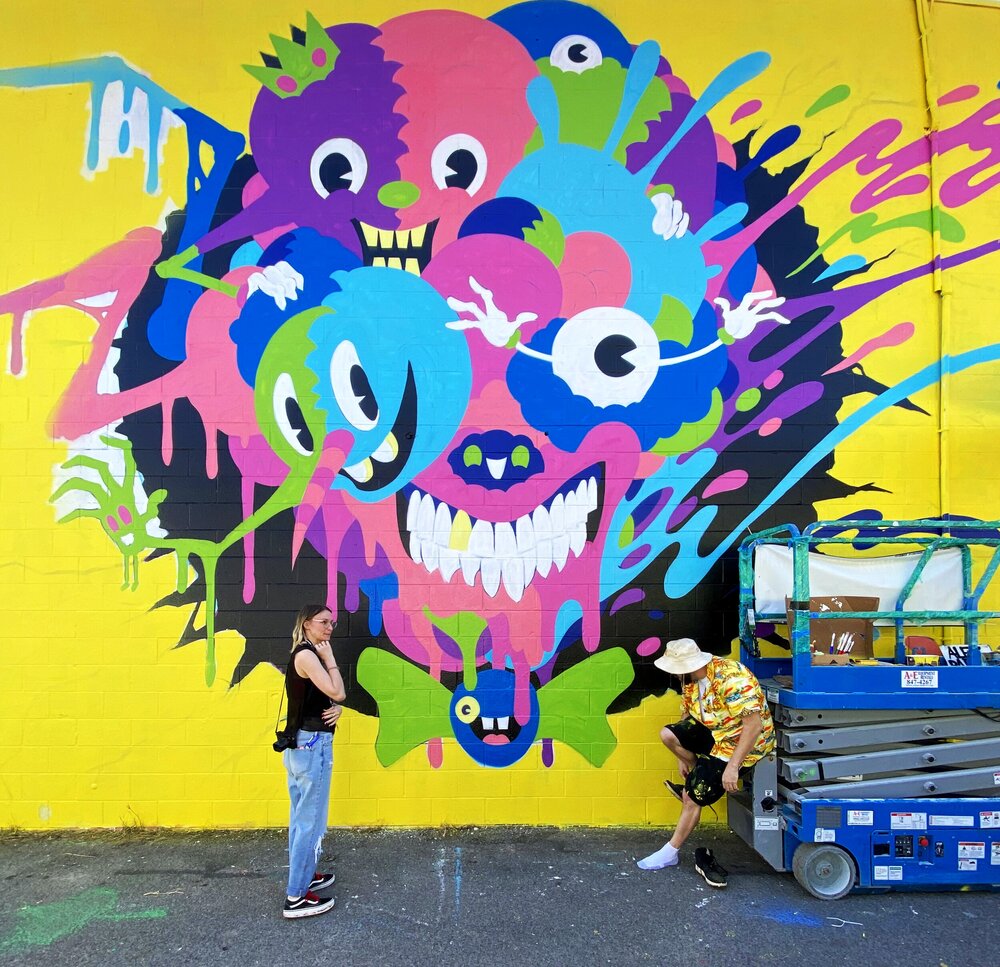
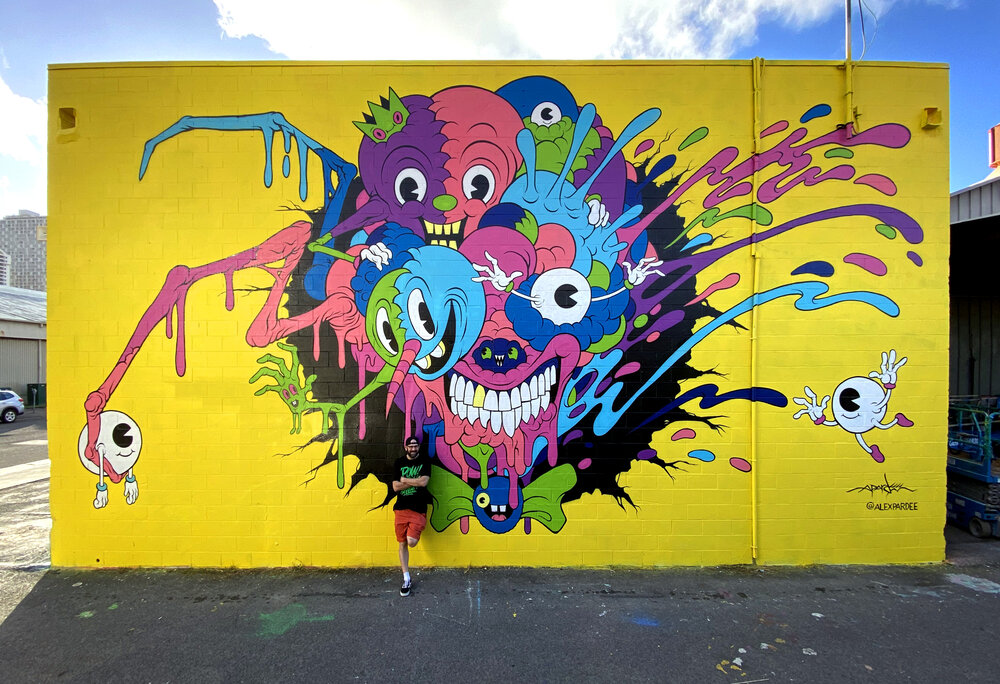
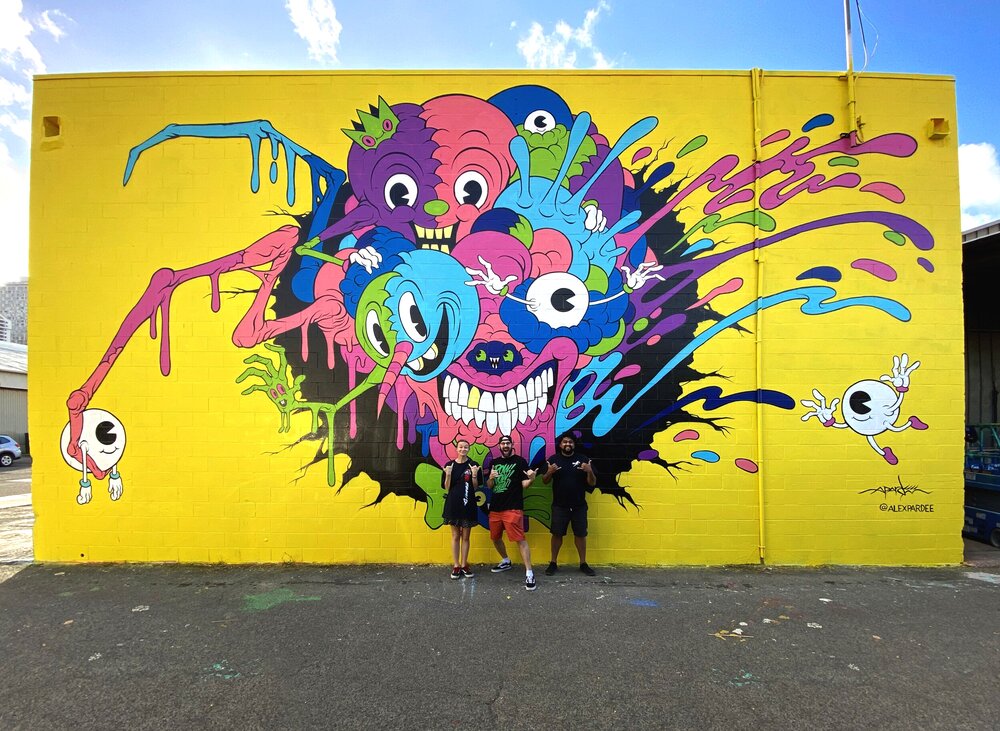
And eventually, as darkness fell on the final night, the outline was completed just as Chloe finished doing a second coat on the yellow and cleaning up my drips, and we were DONE!
Thank you to Chloe and Rocom for helping assist me both physically and mentally, thank you to all of the other 90 inspiring artists who quickly became family, and thank you to POW!WOW! for bringing me out to help beautify the already beautiful community of Kaka’ako in Honolulu, Hawaii.
Photos by Chloe Rice and Rocom

2026 Booooooom Art & Photo Book Award
Wanna turn your art or photos into a book or a zine? Here’s your chance, we’re picking 8 people!
See More
Tomorrow’s Talent 5 Book
This collection brings together work from 60+ artists and is also our biggest volume yet: 276 pages, and for the first time, in a larger format.
Booooooom Shop
Join our Secret Email Club
Our weekly newsletter filled with interesting links, open call announcements, and a whole lot of stuff that we don’t post on Booooooom! You might like it!
Sign UpRelated Articles
